- Branded content, commercials, tutorials, rock videos, storyboards or documentaries – whatever you are producing, image-based AV scripts provide a clear storyline.
- Add a script
- Add a scene/segment
- Scene elements
- Inserting and moving scenes
- Expanding and collapsing the script view
- Editing and deleting scenes

Branded content, commercials, tutorials, rock videos, storyboards or documentaries – whatever you are producing, image-based AV scripts provide a clear storyline. #
AV (Audio Visual) scripts are ideal when a drama script format isn’t visual enough or when you need more detail. Dramatify’s AV scripts are highly flexible and work well for everything from documentaries and commercials to live entertainment, radio and webcasts.
You and your team can write AV scripts directly in Dramatify, add a wide range of content, each neatly separated and icon-tagged. You can create unlimited episodes, mix AV and drama scripts, and use them seamlessly with all other Dramatify features. AV Scripts are designed to be shown to clients and make production time easy to follow.
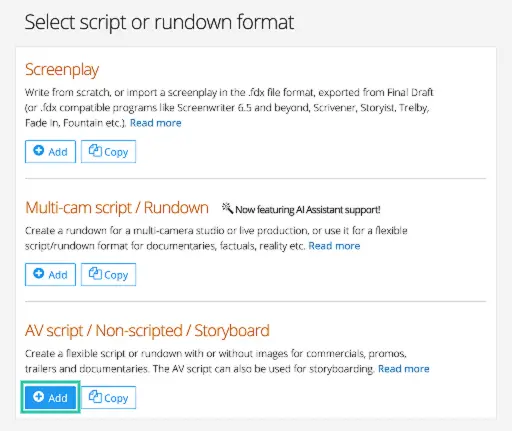
Add a script #
- In the sidebar menu, click Scripts, or Scripts & Episodes
if your production uses episodes. If so, start by creating and saving a new episode. - Click Add underneath the AV script header.
Add a scene/segment #
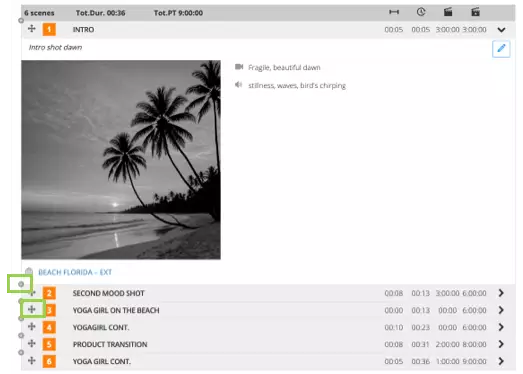
- Click Add scene to add a new scene or segment.
- To add a scene between two exisiting scenes, click the small grey + icon in the left-hand margin.
Scene elements #
Mandatory elements #
Each scene requires the following:
- Scene number
- Scene heading
Creative & Production Elements #
Adding times helps both to outline the creative thinking and set reasonable expectations for clients.
- Estimated segment time (final screen time)
- Estimated production time
You can then add any creative elements needed. Dramatify only displays the items you include:
- Storyboard image
- Camera instructions
- Action / image description
- Dialogue / sounds
- Sound / sound effects / music
- Participants (add participants first in Characters or the breakdown)
Adding an image #
Upload storyboard or reference images at the top of the scene input form. You can use anything—from professional artwork and concept images, to screenshots , simple sketches or shots captured on your phone.
Adding cast/characters (optional) #
- Add existing cast, participants, characters or speakers by clicking in the input field and selecting a cast member or character from the dropdown list.
- Add new cast or characters by clicking the + icon to the right of the cast input field.
Adding sets (optional) #
- Add existing sets by clicking in the input field and selecting a set from the dropdown list.
- Add a new set by clicking the + icon to the right of the cast input field.
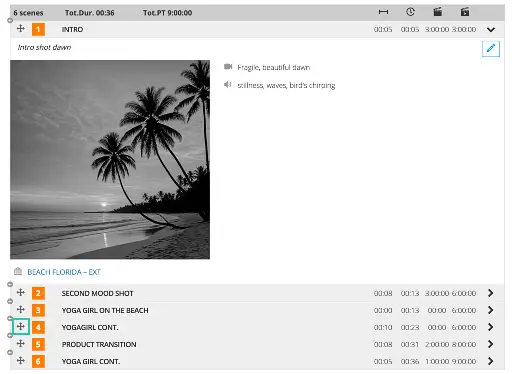
Inserting and moving scenes #
- To insert a new scene between two existing scenes, click the small grey + icon in the left-hand margin
- To move scenes and rearrange your script, grab the cross icon and drag and drop the scene to where you want it.
Expanding and collapsing the script view #
- Use the arrows on the right-hand side to expand and collapse scene information.
Editing and deleting scenes #
- Click the pen icon to edit the scene.
- To delete, click the pen icon and then scroll to the end of the form and click Delete on the left-hand side.
Note! This action can not be undone.
