Creating call sheets
Dramatify’s call sheets are the finishing point of an intricate web of linked content. If you have done the prep correctly, creating a call sheet accessible online, on mobile devices and in print will only take you a few minutes.
Where?
To create or edit a call sheet, click on Planning. See below how to create and edit call sheets.
Before you start: Teams
You add, remove and edit teams by going to your Production page, click Admin in the upper left corner of the toolbar and then click the Edit menu in the right hand corner of the toolbar.

Two ways of creating call sheets
There are two ways of creating call sheets:
- The first time you click on Planning, Dramatify will ask you if you’d like to set up production days in bulk.
- The other way is adding production days and call sheets on the Planning > Days overview page.
STEP 1: Add a new work day

As you add production days, you get grid items for each team you added when you set up the production.
STEP 1.5: Call sheet types
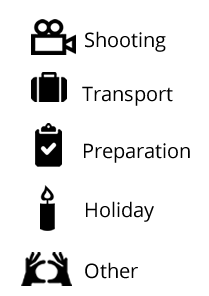
 Dramatify offers five types of call sheets. We have the traditional call sheets for shooting days, but also offers simplified call sheets for other types of days: preparation, transport, holiday and other.
The simplified call sheets have fewer headlines than shooting call sheets, and the simplified call sheets for preparation, holiday and other look like below:
The transportation call sheet type also hold the transport headline.
This means that you can not only have call sheets for teams on shooting days, but also on any other kind of day you need. This also makes it possible for you to create a team that only deals with scouting, prepping or set construction for instance. They get their own call sheet of when and where they should be and what they should be doing.


STEP 2: Adding call sheets

Click on each team to assign what they should be doing that day; prepping, travelling, shooting, holiday or other. You can also add a title if you want. If you don’t, the call sheet will show the call sheet type as the title.

STEP 3: Adding standard working hours
- An automatic production schedule with times as you schedule your production, provided you have also added estimated production times in the breakdown.
- Working hours automatically added to the call sheets.
Setting standard working hours
To set standard working hours, click on the Edit icon and select Settings in the toolbar menu.

Add Unit Call / Start time and planned Wrap / Finish time. Click on the 12 h / 24 h button if you’d like 12 hour time with AM / PM.

STEP 4: Adding radio channels
In Planning, click on the Edit icon and select Settings in the toolbar menu.

Add as many radio channels as you need below the working hours.

STEP 5: Start creating call sheets
The call sheet headline shows you production day, team and call sheet type. Should you want to change that headline, click on pen icon to edit.

STEP 6: Adding unit notes

To add unit notes, click on the pen icon. Unit notes are always open when your team read your call sheet, so here you should put any very important information that shouldn’t be missed.
STEP 7: Adding non-standard working hours

If you need to change the working hours to non standard working hours, click the edit icon to the right in the working hours box, and edit the working hours. Non-standard working hours will be displayed in red in the published call sheet to draw attention to them.
STEP 8: Health & Safety information
Automatic addition of safety and security personnel
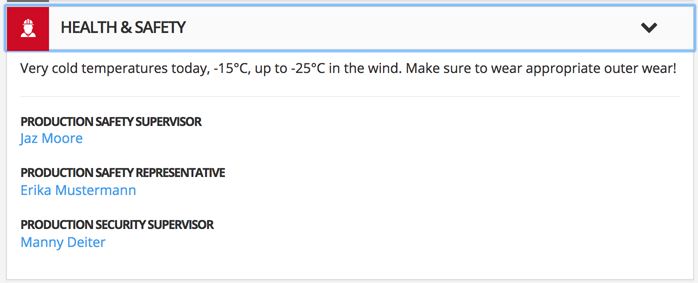
If you have added any staff as safety supervisor, safety representative and/or security supervisor, their names will be automatically added to the call sheet. In the digital call sheet, the information will be added to the Health & Safety section whereas in the printed call sheet templates, it is added to the call sheet header.

STEP 9: Adding unit base and medical emergency location
Locations are automatically added by linking scenes to sets and sets to locations. The easiest way to do this is in the breakdown. You can also link sets to locations by clicking on the set in the set list. More on working with sets.
Shooting locations are linked to unit bases and medical emergency locations. Just click on the location in the location list, and then on the pen icon on the location page. More on working with locations.
STEP 10: Adding scenes
There are two ways of adding scenes to a call sheet in Dramatify.
Scenes added during scheduling
If you have used our scheduling, the scenes and banners you have added to this shooting day will already be present when you open the call sheet for the first time.

In the call sheet, you can use the cross at the beginning of the scene slugs to change the scene order by simply dragging and dropping. The changes will be reflected in the scene scheduling.
Click the arrow to the right of the slug / scene header to open the scene and see which information you have linked to the scene during breakdown. If you want to change or add to any of this information, you can do that in the breakdown. If you want to remove a scene from the call sheet, simply click on the trash can.
You can also add more banners if you lik by clicking on + Banner at the top of the Scene section. As you see to the right in the banners, you can edit and delete banners.
Adding scenes straight into the call sheet
If you have not used the scheduling, you click on the add scenes icon (+ icon in the upper right corner of the “Scenes” headline) to add scenes. You can add scenes one at a time, or multiple scenes at once if they are in sequence. Drag and drop them in the right order, and add banners as you need.
A note on start times in the production schedule
If you have added segment and production times to your scenes, Dramatify will automatically start counting the time from the first work hour you have set, and add the start time of each scene or banner activity you have set.
If you DO NOT want any start times added to the call sheet Scenes section, DO NOT add standard working hours nor estimated scene time/length and production times in the breakdown.
STEP 11: Adding banners to a call sheet
You simply click on the “+ Banner” link in the upper left corner.

You can then add the banner activity text and the duration of the event in hours and minutes.

STEP 12: Adding cast calls
Cast calls are added in the Daily Cast scheduler.
STEP 13: Adding crew
STEP 14: Adding transport
In the call sheet, you can add any additional transports, from crew transport to picking up cats or camera equipment.
STEP 15: Adding department requirements & notes
and what they should bring and remember during the day.

If you want to, you can delegate the adding of department requirements and notes so each department adds their own. This requires that you make the team members who should be doing the writing, into admins. Learn more how to do that in the article on Administering Team Members.
There you can also learn how to make a team member Head of Department. In the call sheets, that means that we automatically add their name and phone number to the department requirements. If the user is on mobile, that means one-click calling, texting, messaging and emailing.
STEP 16: Weather forecast
Adding automatic weather forecast
On the call sheet edit page, in the middle of the page, you’ll find the weather report. To add the automatic weather forecast, just select the location you want the report for. If there is no locations in the dropdown menu, your scenes have no locations linked to them. Learn more in Working with locations to fix that.
Manual weather
You also have the option to add a weather report manually if you prefer that.
Troubleshooting
Should your published call sheet NOT include a weather forecast, please click and check the link/s to your shooting locations. Sometimes Google maps don’t have a street address in their database and you need to go to Locations > your location > edit location and add it through the map interface of your location, i.e. find your location on the map and click to make certain you get the correct GPS coordinates at the bottom of the edit location page.
STEP 17: Adding and change dates
Add one date at a time
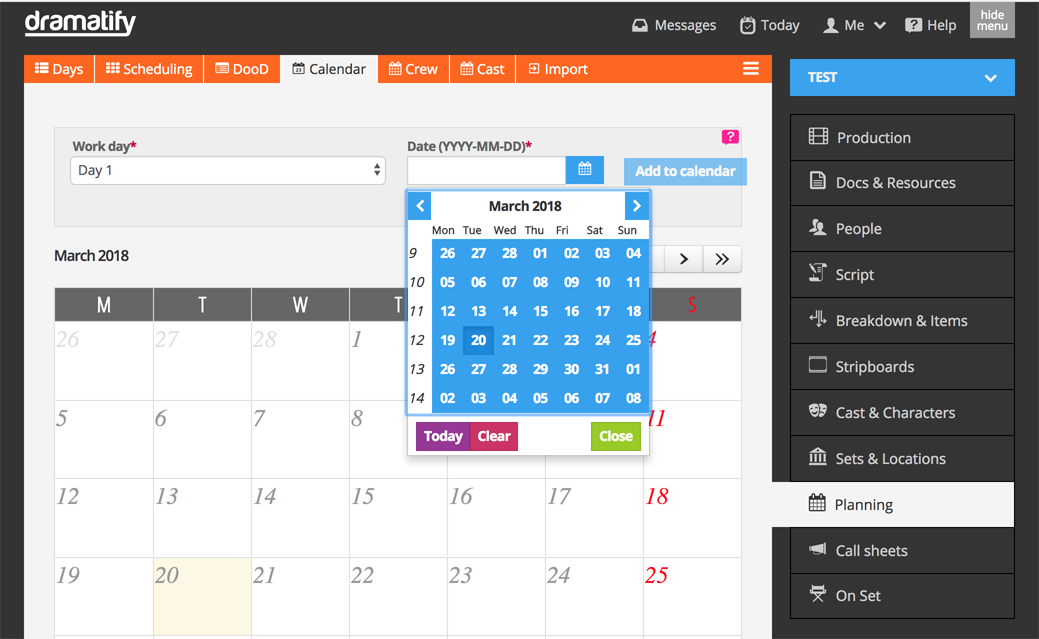
Click on Calendar in the orange toolbar and get a great calendar overview. Use the Add to Calendar at the top to assign dates to production days. Here you can also move production days by drag and drop on desktop, and click and edit on any device, including tablets and smartphones.

Add and change dates in bulk
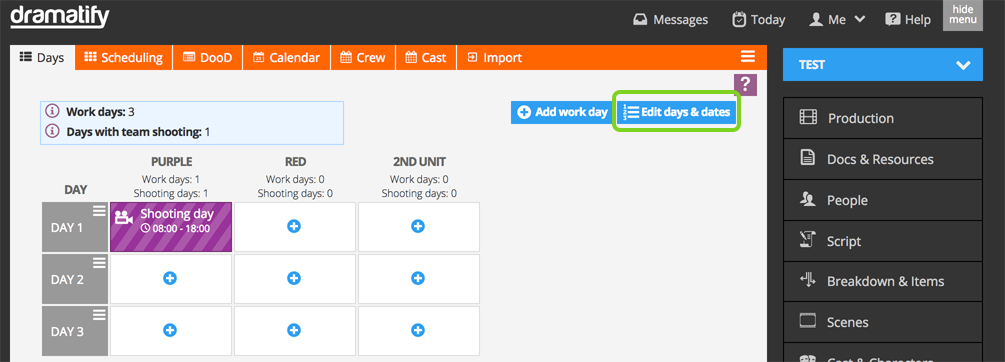
Click on Days in the orange toolbar and you go to the grid overview. Click on the blue button “Edit days & dates”.

In the form, select the second option “Start from a specific date”. Now you can add all production days, or a range. You also check which weekdays you want the production to run.

STEP 18: Publish and unpublish a call sheet
Leaving the call sheet unpublished, is great if you want to pre-produce call sheets and later add any last minute details and publish it closer to the production day.
To publish a call sheet
- If you want to publish your call sheet, just click word “draft” at the top of the edit call sheet page.
- You can also, as you see in the second image below, click the edit icon on the call sheet edit page, check the Publish box and then save the call sheet.
If you haven’t added a date, you will be asked to. You can not publish a call sheet without a date.


To un-publish a call sheet
You can also un-publish the call sheet should you need to. Just un-check the “Published” box above and save the call sheet.
View which call sheets are published and not
Published call sheets are in a solid colour, and un-published call sheets are striped.

Note: Archived call sheets
After the shooting day, published call sheets are automatically moved to the “Archive” tab, where you can find all past call sheets.
STEP 19: Announcing published call sheets

Adjust the text if you like! Write your message, and note that you do not need to link to the call sheet, it will be added automatically. Select your production in the drop down menu, then click save to send it.

Your message will now be shown to everybody in your production who are logged on to Dramatify,
but will also be forwarded to the email inbox of everyone in your team list, including team members that have been invited but who haven’t yet logged on.
STEP 20: Printing a call sheet
- The Modern Call Sheet – with a focus on readability
- Compact Callsheet – with a focus on getting as much information into a sheet as possible
![]()
Your printed call sheet will look like a traditional call sheet (but nicer) and not like a printout from the online version.
Trouble shooting
I don’t see any cast calls
Under Planning > Cast, you schedule your cast. You need to select a team and a cast call time for your cast to appear in the call sheet.
I don’t see any crew list
Under Planning > Crew, you schedule the crew that should be on set.
I don’t see any weather forecast
Select the location in the call sheet that the weather forecast should be based on. Click on Planning, then on the day/team and click on the edit (pen) icon.
I want to add head of department and contact information in Requirements
Click on People and select the person you want to add, click on the menu in the lower right corner and select edit. Under Permissions & Visibility > Visibility, check “Head of Department”.
I want to add Useful Contacts with phone numbers in my printed call sheets
Click on People and select the person you want to add, click on the menu in the lower right corner and select edit. Under Permissions & Visibility > Visibility, check “Useful contact”.
Try Dramatify today - if you haven't already!
30 days free trial! No credit card required.