DPR – working with the daily production report
Dramatify makes your daily production report almost automatic by aggregating information that you and your team already have added to Dramatify, and then adding a smart signing function. Here’s how you create production magic with us!
Where do I find the DPR, Daily Production Report?
Note! You need to be an Admin to see, and have access, to the DPR menu item. Regular team members do not see nor have access to it.

Before you start
You’ll find the core DPR functionality on the DRP list page which is the first page you arrive at when you click on DPRs in the orange toolbar.

Select workday
In the dropdown, you select which workday you want to create a draft for and then click the blue button.
A few things to take note of:
- The usage of the term “workday”: You can create a DPR for both shooting days and any other kind of workday in the production as long as they are scheduled in the list of workdays on the Planning > Days page.
- You will ONLY see today’s date and past dates if you have scheduled workdays for them, and if drafts haven’t already been created or reports submitted.
- If you want to make full use of Dramatify’s automatic DPR features, do not create a DPR draft until all meals have been checked, and all cast & crew have been checked out. You can add this information manually from the time sheet cvs export too, but of course you save a lot of time letting Dramatify do the work for you!It’s smart to make a habit of checking the automatically added information in the DPR draft before editing and adding new information. If some automatic information like time sheets, releases etc. is not in place, you can either add them (see below), or in the case of time sheets, wait for cast & crew to be checked out.To update with the new information, you must delete the draft and then create it again. This way you force a data update but do not loose any information since you haven’t stated adding any manually. To learn how to delete a draft, look at the last section below.
Signers
Below the dropdown, you’ll find the signers of the DPR and the option to add anyone who should sign a DPR. Simply find their name in the dropdown “Add a member that will be able to approve reports” and click “Add member“.
On each individual DPR, you can then check who should approve that specific DPR. This means signers can vary between different days and locations, or be the same for the entire production. Your choice!
SECTION 1: Getting the information in the DPR header right

However, if something is wrong or missing, here is a quick guide to where the various information can be changed:
| # | Information | to change, go to | then |
|---|---|---|---|
| 1 | Title | Production | Click on the edit icon beside the title |
| 2 | Day started | Production | Click on Settings in the toolbar. Day started is the first day of the “In production” date. |
| 3 | Est. End Date | Production | Click on Settings in the toolbar. Est. end date is the last day of the “In production” date. |
| 4 | Day X of Y | Planning | X = this is the day number of the workday, Y = the total number of scheduled days. |
| 5 | Company name and contact information | Production company (find your profile (Me) in the top, and click on the dropdown arrow.) | Click on the Edit menu and select “edit”. |
| 6 | Principals | People | For each person who should appear as a principal in DPRs, call sheets and on the Production page, click on “edit” on their profile card, then check “Principal Member” under “Permissions & Visibility”. |
| 7 | Status – thumb up or down | On the DPR you are drafting | Just click on the edit icon in the upper right corner of the header section to set status. |
| 8 | Days estimated | Production | Click on Settings in the toolbar, and then on the edit icon in the upper right corner. NOTE! The number of days given is NOT the same as in #4. Read why below! It can also be manually corrected by clicking on the section edit icon. |
| 9 | Days passed | On the DPR you are drafting | Automatic from the number of production days passed, but can be manually edited by clicking on the section edit icon. |
| 10 | Ahead & Behind | On the DPR you are drafting | Just click on the edit icon in the upper right corner of the header section to modify. |
The difference between “Day X of Y” and Days Estimated
The number at the top of the DPR, “Day X of Y” , is dynamic and reflects the work day number out of the number of scheduled production days that you can see on the overview at Planning > Days. It is the same as the call sheet numbering. This number is usually automatic and you don’t have to do anything with it, even though there are a manual override should you need it.
In the lower, right hand side of the header, you find Days Estimated. This is fixed. This is not an automatic number, but one set in Production > Settings. Why is it different from the scheduled production days, and not automatic? In the best of worlds, everyone is always on target. But we all know that delays happens. With a set number of shooting days, we can also add information if we’re behind or ahead.
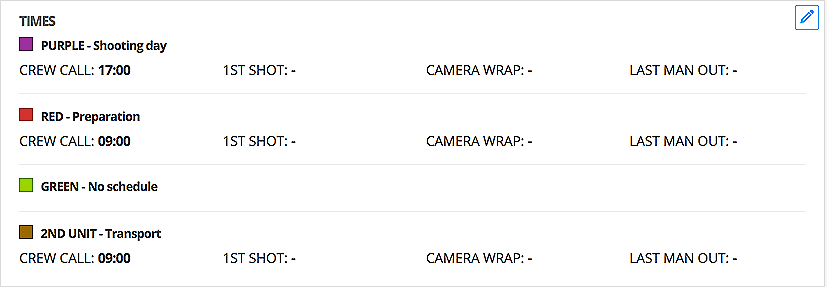
SECTION 2: Adding Times
- first shot
- camera wrap
- last man out
If crew calls were delayed, these can be edited manually as well.

SECTION 3: Locations
Should you by any chance shoot a scene that is not listed in the call sheet, you can update the call sheet by adding the scene. That means it will also appear in the DPR.

Locations is a completely automatic section where we grab the locations from the call sheet. They are in turn automatic through the links between scenes, sets and locations.
Should you by any chance shoot a scene that is not listed in the call sheet, you can update the call sheet by adding the scene. That means it will also appear in the DPR.
SECTION 4: Scenes & shot status

The Scenes & Shot Status section is semi-automatic.
- Dramatify automatically imports the numbers from previously filed reports and add them under “Previous”. These you can’t change.
- Dramatify automatically adds today’s scheduled scenes that have been status checked in the call sheet in the “Today” row.
- You then manually add the number of setups, added scenes, any retaken scenes and retaken pages as well as notes for today and previous days. If you add a note on the row for previous day, it will show on the DPR you are working on, not be transfered to any other day. To manually enter information, just click the edit icon in the top right hand corner of the section.
- Dramatify automatically sums up the information and when the report is signed, adds the total to the “Previous” row of next day’s DPR.

NOTE! If a filed DPR is rejected (learn more below), you can also manuallt edit Scenes today, Pages today och Estimated scene length which otherwise is automatic.
SECTION 5: Media usage

The media usage section is mostly manual. Click on the edit icon in the upper right corner of the section to add the cards used, footage description, audio description etc. Dramatify will then sum up your information and add it to the previous days media usage information.

Still shooting on stock? If you’d like to get a DPR that works for traditional film stock, let us know!
SECTION 6: Equipment & Tech notes

SECTION 7: Health & Safety incidents & notes

SECTION 8: Crew & Cast Time Sheet
This is one of the big time savers with Dramatify’s DPR. All cast & crew time sheets are added automatically from the timesheet log. Also note that only cast have automatic travel time, scheduled in the daily cast schedule.
Overtime hours and overtime notes is something you need to add yourself. The reason is that different countries have different regulations regarding overtime.
To add overtime and the reason for it, click on the edit icon in the upper right corner of the section.

SECTION 9: Talent release log

If you want to check that all cast have releases, here’s how:
1) All cast but atmosphere
Go to People and click on Report in the orange toolbar. You see check marks under the headline “Legal” next to each cast member if you have added a personal release and/or a contract. Move the cursor to see if it’s a personal release (check mark with blue background), or a contract (check mark with white background).
If a release is missing, find the cast member’s profile card on People > Cast members, click the menu icon in the lower right corner of the card and select Edit. At the bottom of the page, you’ll find the release and contract upload.

2) Atmosphere cast
Atmosphere cast do not have access to Dramatify and is handled by casting. However, they are managed as a group in Dramatify. Go to Cast & Characters and click on Atmosphere. Click on the atmosphere group your cast member is part of. Here you can add and find all atmosphere cast members, their names, contact details and releases.


SECTION 9: Location release log

If you want to check that all location have releases, here’s how:
Go to Sets & Locations, and click on Locations at the top. Find the location you need in the list. Here you can find one of three things:
- No indication of a release
- Information about a release missing
- A linked release
To add a release, click on the location name, and then on the edit icon in the upper right corner of the location info section.

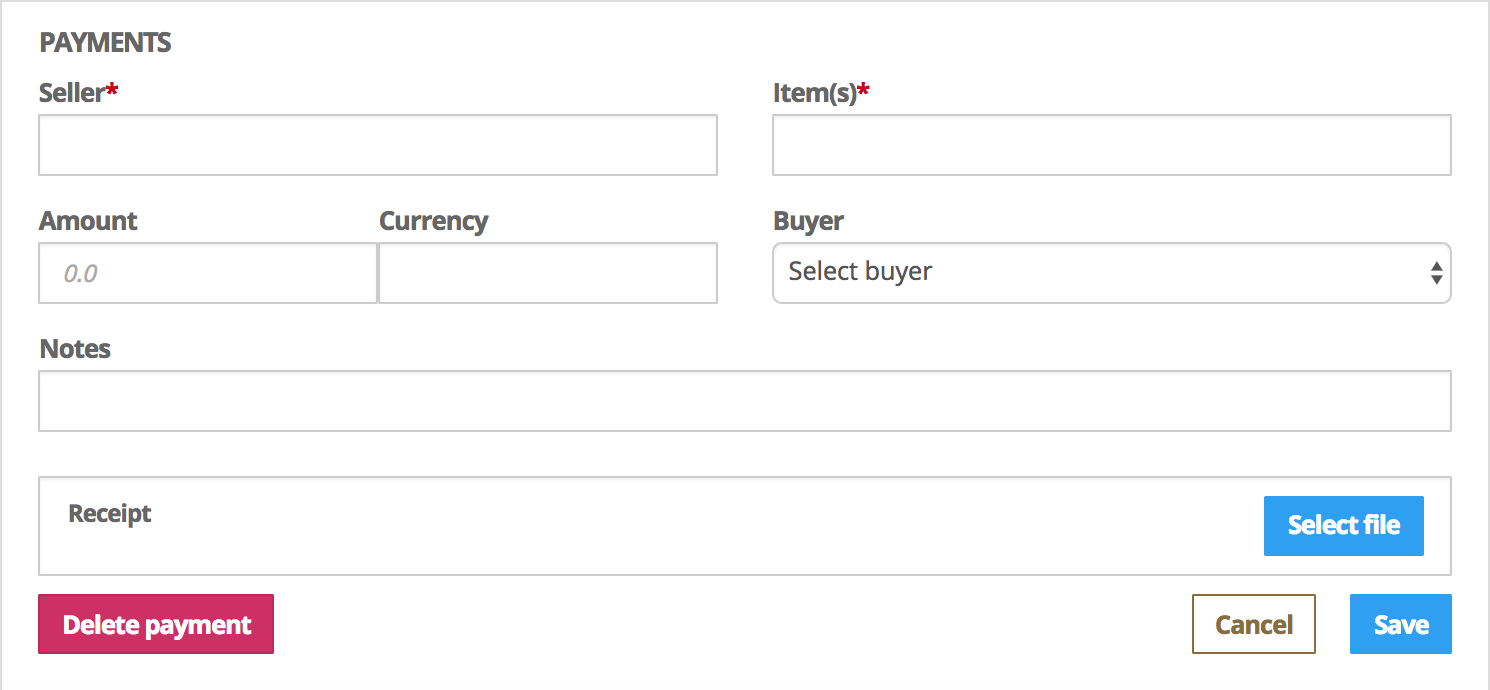
SECTION 10: Payments log

The payments log is a manual section. Here you can add any payments you want to report, and snap a photo, a scanned document or an e-invoice to attach as a receipt. You can also add a buyer, i.e. yourself or the team member who made the purchase.

NOTE! If all your payments are in one currency, Dramatify will sum the total. If you add several currencies, these will be presented without a total sum.
SECTION 11: Notes

SECTION 12: Signing the report

Just select the individuals who are going to sign off on the current DPR and save.

Now click “Lock and send for approval”. The designated signers will now both get a message in Dramatify and an email to their email address that they should sign.

- If all is good, signers just click “Approve”
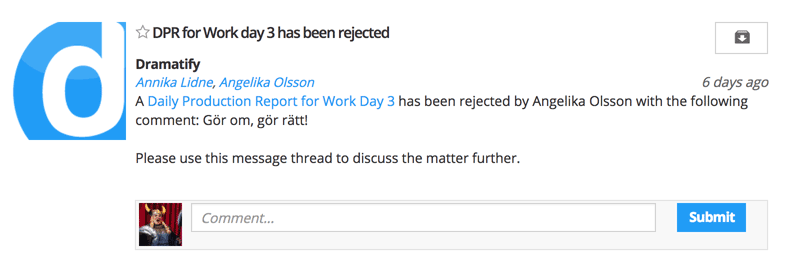
- If something is amiss, signers click “Reject” and add a comment to explain what is wrong.
- Signers can also change an approval and reject the DPR with a comment if necessary.


The comments allows you to change information or add missing information. You then click “Re-send for approval” at the bottom of the page.

DPR list status
On the DPR list page, you see the status of each DPR at a glance. Approved reports are locked and can not be changed. Executive producers and producers (with Admin permissions) can read them, and you can print them as PDFs to send to co-producers, investors, insurers and bond companies.

SECTION 13: Deleting a draft - a way to update automatic information
If you want to update automatic information, you can delete a draft and create it again. However, if you have added any information it will be deleted.
Top image by Garry Knight /Flickr (CC BY 2.0) People in the image is unreleted to Dramatify.
Try Dramatify today - if you haven't already!
30 days free trial! No credit card required.