Quick Start Guide
GET STARTED WITH DRAMATIFY IN A SNAPDramatify’s Quick Start Guide
Welcome to your production’s new command center. Dramatify lets producers, coordinators, and creatives move from idea to wrap with fewer spreadsheets and faster turn-arounds. Follow this Quick Start to hit the ground running—then invite the rest of your team to experience the difference.
Sign up or get an invitation
You can join Dramatify in two ways:
- Sign up to create projects and productions. For this, you will first create a personal profile and then a business account.
Note! If you are part of an organisation already using Dramatify, please contact your Dramatify administrator or support before creating a new business account.
- Get invited to join a project or production. You do NOT need to sign up; just wait for an invitation email.
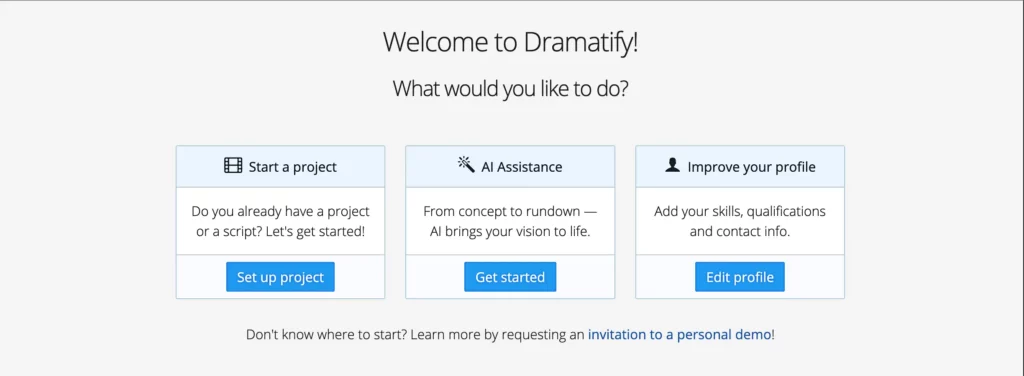
After signing up, you’re transferred to the app welcome page to choose your path forward.
– Activate your account
Check your inbox for the activation email and click Activate my account. This confirms that we have the correct address, allowing production messages and invites to reach you instantly, as well as enabling you to reset your password if necessary.
No e‑mail?
Check your spam folder, then whitelist Dramatify to prevent vital production messages from being sent to your junk mail.
Important: The email and other contact details you add during registration are visible to the team. Double‑check them so colleagues can reach you.
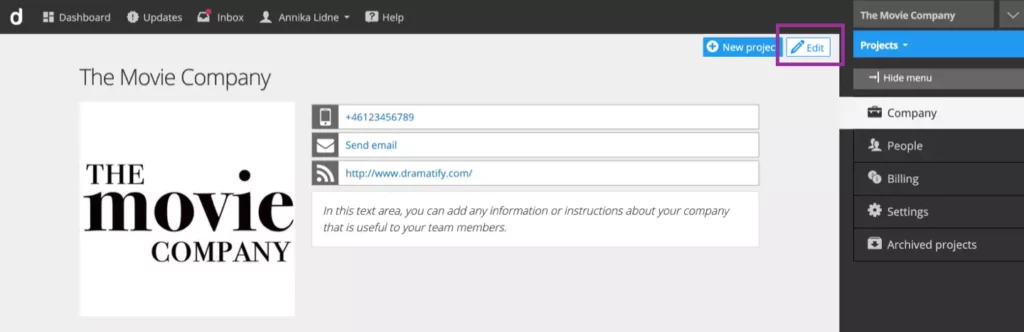
– Complete Your Company Profile
Finish filling in the remaining company details to unlock three key benefits:
- Accurate billing – every receipt and invoice displays the correct information.
- Easy discovery – cast and crew can quickly access up-to-date contact and invoicing details.
- Branded paperwork – your logo watermarks reports and scripts, protecting your IP and reinforcing your brand.
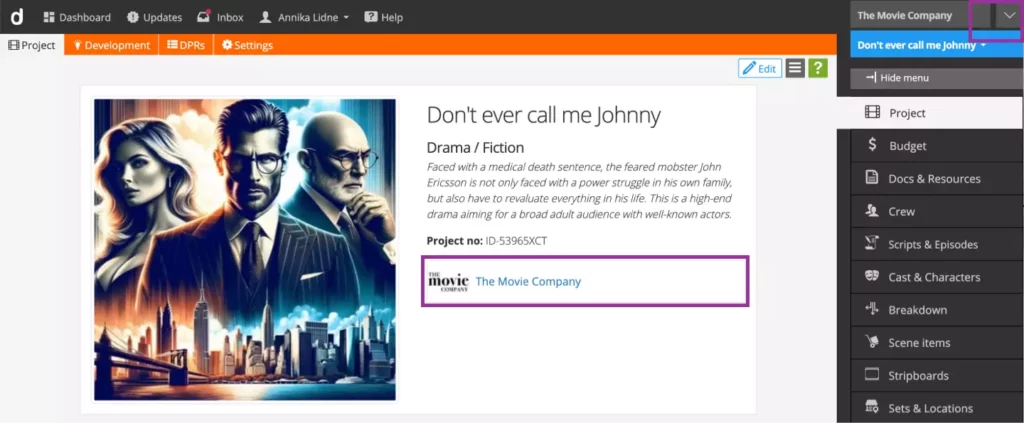
To complete your company profile, either click the company navigation in the upper right corner or your company name on a project page, then click Edit:
– Enhance your profile
A full profile makes sure your team members can contact you and know important qualifications, but also autofills contact sheets, catering lists—saving your coordinator hours.
Navigate to your name in the top navigation › Profile/Settings.
Click Edit, and add bio, socials, IMDB, qualifications, ICE contacts, dietary notes and more. Protected information for Admin eyes only is marked.
AI-Powered Show & Slate Development
After signing up, you’ll land on the Welcome page. Here you have the opportunity to try out our AI-Powered Show & Slate Development to generate ideas for your next hit shot.
Three simple steps:
- Generate ideas according to your requirements
- Save the ideas you like, modify your requirements and generate more. Repeat as necessary.
- Generate episode synopses and episodes for your best idea.
You have 100 free AI credits for your ideation.
During the process, you will be asked to create a project and a business account. See below!
Start a project or production
After signing up, you’ll land on the Welcome page.
- Start a project.
- Fill out the information on the page and save.
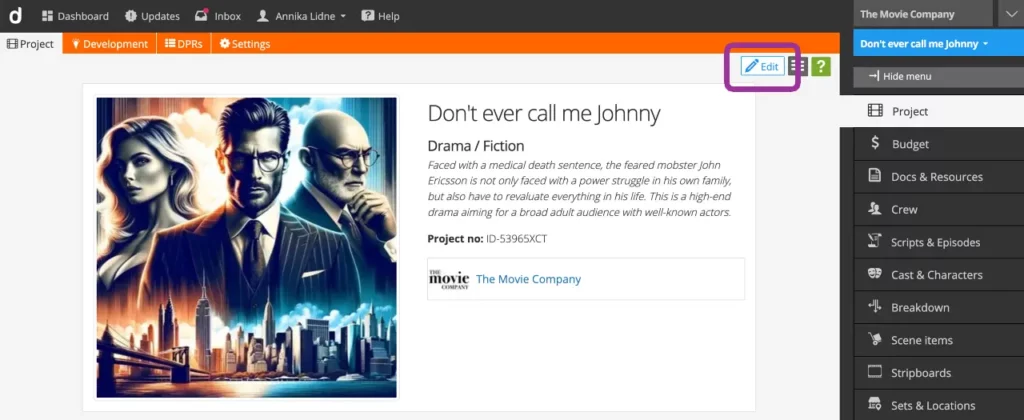
- To change or expand any part after you have saved, click Project in the sidebar menu and then Edit.
Important! Proceed to Step 5 and add your Organisation details for full functionality.
– Add key team members
Click Crew > Add Crew
You now have three choices:
- Add an individual team member
- Add from your network (if you have worked with Dramatify before).
- Upload a .csv file (can contain both crew and cast)
For each member:
- Choose project role and access level.
- Either pre‑populate their profile (photo, phone, important details) or let them fill that out themselves.
- You can invite members immediately or later.
To add cast members, navigate to Characters & Cast and click Add.
Overview of roles and permissions
Add a script, rundown or screenplay
Dramatify handles both series and features/single episode productions. You can write and copy screenplays, rundowns and AV scripts in Dramatify. Screenplays in the .fdx format can also be uploaded.
Script types
- Multi-camera rundowns for live and studio shows, featuring full broadcasting capabilities with AI writing support for timed outlines and script content.
- Screenplays for drama and narrative content. Write natively or import .fdx scripts and rewrites. With import, you automatically get import of all characters, sets, page lengths, and any tagged content.
- Image-based AV scripts for branded content, commercials or limited storyboards.
Note! If you upload a .fdx screenplay, ensure it is formatted correctly with scene numbers, scene headers, characters, etc. For an accurate result, please read the instructions on the upload page before you upload your file.
Add scripts and rundowns
- Features/Single episode productions: Click Scripts in the sidebar menu of your Project and select your script type.
- Series: Click Scripts & Episodes in the sidebar menu of your Project. Create a new episode. When saving, you will be transported to the Add script page where you select your script type.
Tap the green question-mark icon inside the app to open help pages tailored to each feature.
Change from Feature to Multi-episode project (or reverse):
Click Project in the sidebar menu, and then Edit in the upper right corner of the main window area.
Note! If you have created more than one episode, you must delete scripts and episodes before switching to Feature from a Multi-episode project. Go to Project ⟶ Settings ⟶ Delete content from project.
Trouble shooting
If you can’t add the script type you want to add, your company may not have the correct subscription plan (if you have already subscribed). Here is a comparison of the various plans.
Budgeting & Estimates
Start creating your budget by clicking Budget in the sidebar menu. You can
- Create a blank budget
- Use a budget template with structure and account numbers (that can be changed).
- Upload a Movie Magic Budgeting XML file. (First, create a blank budget, then upload the file. Note that fringes are not exported from MMB.)
Tap the green question-mark icon inside the app to open help pages tailored to each feature.
Dramatify's Planning & Scheduling Suite
Dramatify offers a suite of planning and scheduling tools that interact in some cases:
- Production Planner – Visual overview planning from start to end of your production.
- Crew Booking – Visual crew scheduling. One entry automatically populates call sheets (if used), timesheets, catering lists, and daily production reports.
- Cast Booking – Similar to Crew booking, but also adds integrations with Shooting scheduling, and:
- Daily Cast Scheduling, which automatically creates:
- Stylist’s schedule and cast calls in the Call sheets.
- Shooting Scheduling – Traditional shooting scheduling for pre-produced content. Integrated with cast booking, stripboards, scene items day out of day report, wardrobe, makeup and hair scheduling, and call sheets.
- Day Planner & Day List – Schedule events and plan entire live shows with the Day Planner. Integrates with the Calendar and optionally digital calendars.
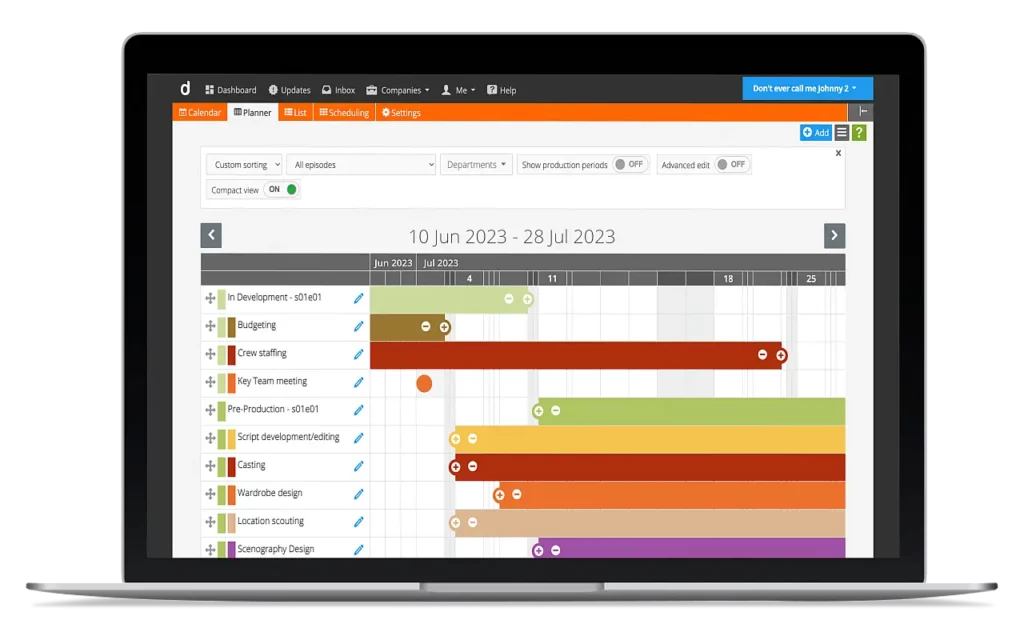
– Production planning
Plan your production from start to finish in the Planning > Planner.
Here you can:
- View and set your production periods
- View and set your episode production periods
- Add custom periods
- Tie periods to master periods and move as a unit in case of changes
- Set custom colours
- Set assignees
Current periods are summarised on the Dashboard for users with at least read access.
– Shooting scheduling
To start scheduling, click on “Planning” in the right-hand side menu.
Planning settings
- You will first encounter some basic settings. (If not, click Settings in the orange toolbar.)
- Going through the settings and presets will save you time in every step.
- Teams are important. Shooting scheduling, day planner, crew booking, call sheets, messages, docs & resources use the team functionality. Click the pen icon to rename, change team colour or turn off a team. You can always add and edit teams later.
- Click Done, and you’ll be sent to the Calendar.
Calendar
The calendar can show both you and your team a lot of useful information:
- Create a headline/day info by clicking the grey headline text.
- Click the Day Planner link to add daily events (see below for more information). Day planner events can be added to the Calendar view.
- Shooting days and call sheets.
- Drag and drop items between days.
Add shooting days
- Click Add above the Calendar to add single shooting days.
- Click the small black menu button to bulk-add shooting days, including typical shooting weeks. Note that you can add days in periods if you have non-shooting weeks in between.
Shooting scheduling – Prep
- Click Settings in the orange toolbar, and then the Scheduling & Call Sheets section.
- To save time during scheduling, set up:
- Set regular Unit Call & Wrap times
- Target number for scheduled hours of shooting
- Standard banners to add banners for standard non-shooting activities like unit calls
Start Scheduling
- Click Scheduling in the orange toolbar. Your shooting days should appear if added as described above. You can work with a calendar view, a stripboard view or a column view.
- Hover over the coloured top of a shooting day/team to bring up the menu and click. Select:
- Edit – to edit the headline and/or start time.
- Custom banner – to add single banners for non-shooting events.
- Add Standard banners – for the banner package you added above.
- Select scenes in the left-hand scene list using the filters, and drag and drop them to your schedule.
- You can also click Bulk Scheduling at the bottom of the filter box to bulk schedule scenes. You will always get a preview and confirm the scheduling.
- Drag and drop banners as needed between scenes to fit your shooting day. Hover over the right-hand side of the banner to edit the title and duration, or to copy it. Banners can also be dragged and dropped to other teams or days.
- Hover over scenes in the schedule to add/edit pages, duration and production time, split the scene or go to the script or breakdown page.
Click the green Help icon in the upper right corner for additional Help.
– Daily event scheduling: Day planner & Day list
Day Planner is Dramatify’s real-time, mobile-friendly tool for scheduling production events and timed tasks—everything from team meetings and location scouts to scheduling large live shows. Day List is the same scheduling feature, but stretched over several days or weeks, allowing you to catch overlaps, resource clashes, and travel conflicts early. Both views update instantly across dashboards and calendars, keeping everyone in sync without the need for PDFs or spreadsheets.
Published events appear
- In the sidebar under Day Planner or Call Sheets (depending on access)
- In the Calendar, when you choose to display them
- At the top of the Dashboard on the event day (personal events)
- In team members’ own calendars when subscriptions are enabled (Planning > Settings > Scheduling & Call Sheets)
Getting started
- Open Calendar in the sidebar (complete any required settings to see the monthly grid).
- On the desired date, click the Day Planner link to add an event.
- In the pop-up, fill in the details, select a highlight colour, and decide whether to display the event in the Calendar (note that too many events there can be unwieldy).
- When ready, flip Publish to ON in the upper-right corner.
- For multi-day or multi-week planning, select Day List from the orange toolbar.
- Click Grid in the Day planner or Day list views to create or view column templates (spreadsheet-style).
Script Breakdown
- Write or create your script and click Breakdown in the sidebar menu.
- Choose how to break down your script: per episode, per set, per character or latest update.
- Click a scene to begin its breakdown. Add every element a scene may need—characters, cast, props, wardrobe, vehicles, FX, and more. Scene items can belong to:
- the set – and will automatically be added whenever the same set is used.
- a character – if marked “persistent”, the item will automatically be added whenever the character is present.
- a scene – transitory/temporary items unique to one or more scenes.
- Click the black menu icon to split scenes, copy items from one scene to another, bookmark and flag.
All items are listed and can be edited in the Scene items section. Click Stripboards for story order stripboards.
AI Script Breakdown – from page to schedule in seconds
Inside a scene, click AI Assistance. Dramatify will automatically:
- pre-tag characters, locations, and dozens of other item types
- draft a concise scene synopsis
- write a location description
You stay in control—review, accept, or tweak any suggestion and save hours of manual work while boosting accuracy.
Multi-Department Collaboration
To create more efficient workflows, your team can collaborate around the breakdown. You can grant partial access to the breakdown for departments such as Casting, Props, Wardrobe, Makeup & Hair, Art, and more, restricted to their specific department inputs.
Breakdown Reports
The orange Reports toolbar turns every data point into a printable, filterable list with powerful sort and export options.
– Managing scene items
The Scene item section list and Day out of Day schedule lists all items tagged in the Breakdown, providing options for adding, editing, and management.
You can also add items via:
- Scene Breakdown – core items present in the script
- Character pages – wardrobe, hair & makeup, props break their own items
- Set pages – add construction and dressing elements
- Scene Item list – global overview for edits, tagging, printing
Each item is assigned to a department and features searchable tags.
Scene items DooD
The Scene Item Day out of Day schedule syncs automatically with shooting scheduling to display the items needed for each day. You can also view them in Stripboards (see the sidebar menu) by turning them on and off through the menu > black icon in the upper right corner.
Adding and managing characters & cast
Fiction vs Non-Fiction Projects
Fiction (screenplay)
- Characters are imported automatically when you upload the script or can be added later during the breakdown.
- Each character is linked to a cast member during the casting process.
Non-fiction
- Cast members generally “play themselves,” but each still gets a character entry for production needs.
- Character pages store production info such as booking sheets, wardrobe notes, and location details.
The Cast & Character List
- The list displays every character and cast member and is the portal to individual character/scene detail pages and cast information.
Tabs adjust dynamically to any additional character types you introduce—reporters, dancers, and so on.
Click a character’s name to open its page, or choose Add character to create a new one.
The Character Page
Each character has a dedicated page containing:
- Character details inc. images
- Scenes in which the character appears
- Scene items (props, wardrobe, makeup & hair notes)
- Booking sheet
- Continuity
Wardrobe, Props, and Makeup & Hair teams can update their breakdowns directly here—even on mobile. All items are listed in the specific character stripboard for quick retrieval on shoot days.
Adding Characters Manually
- Add cast/character: Use the Rundown (per scene), go to Cast & Character › Cast › Add or use the Breakdown.
- Add background cast (extras): Click Background in the orange toolbar on Cast & Character › Cast or within Breakdown. Extras are managed as a group by the extras/atmosphere manager and are not invited into Dramatify.
Connecting a Character with a Cast Member
- Open Cast & Character › Cast.
- Click Add cast member next to the character’s name.
- Select an existing cast member from the dropdown or choose Add new cast member.
Linking Stand-ins, Body Doubles & Stunt Performers
- Open the desired character page and click Edit (top-right).
- Scroll to Cast and relations and expand the panel.
- In Stunts, Body-double and Stand-in, follow the prompts to connect each role.
Cast & Character Reports
- Characters report: salary details and high-level overview.
Navigate to Cast & Characters › Reports › Characters. - Cast list: full contact information.
Click Cast in the same Reports section.
Access & Privacy
Because cast entries may include sensitive personal data, access is restricted by default.
Review Step 7: Add key team members for guidance on assigning the correct access rights.
Adding and editing sets
To clarify the difference between a set and a location:
- The set is the place where a scene plays out that may or may not need to be designed and built, whereas
- The location is the actual physical location with a GPS location where the shoot is taking place.
Adding sets
Sets can be added in various ways:
- On the Set list page (Sets & Locations > Sets > Ass set
- Imported during .fdx screenplay import
- Added in rundowns during writing
- Added during breakdown
Edit sets
To edit a set, click on the set name to navigate to the set page and then click the edit icon.
Link a set to a location
On the set edit page, link the set to a new or existing location. This will not only unlock smart listing features, but also other automatic features, such as weather reports in call sheets.
Smart use of set pages
On the set pages, scene items belonging to the set from the script breakdown are displayed, and you can also add and edit scene items. You can also add inspirational images, drawings, 3D files, and documents, as well as log continuity for the set.
Adding locations
Sets need to be connected with the physical shooting locations at some point during the pre-production. You can also add locations for Unit Base and Medical Emergency Location. To add locations, click the Location menu, then on the Edit menu icon, select “Add location”.
When you add a correct address to your locations, all locations will automatically get map links in the call sheet for easy navigation for your team. A correct address to your shooting location also automatically gives you updated weather in your call sheet on the day of shooting.
Location permissions
Only Admins can see and work with locations.
TIP! It’s good practise to test the links before publishing your call sheets. Some parts of the world have have less developed map support than others. If you get an incorrect map address, try adding GPS coordinates instead of an address.
Try Dramatify today - if you haven't already!
30 days free trial! No credit card required.