Working with locations
Driving directions, GPS & weather!
Dramatify provides you with three types of locations. With correct addresses, you will also automatically get map links and updated weather forecasts in your call sheets.
NEW! Please read about the new location report below!
Where do I find Locations?
Click on Set & Locations in the sidebar menu, then on Locations in the orange toolbar.
The different location types
If you haven’t read the article on Sets yet, please do that first.
Dramatify’s three types of location
Dramatify offers three types of locations:
- Shooting locations
- Unit Base
- Medical Emergency Locations
Shooting locations are of course the most important since it’s there shooting actually takes place. A shooting location is tied to a unit base, a set and a scene. You can have multiple shooting locations per day. The automatic weather forecast in the call sheet is tied to the shooting locations.
A unit base is common when not using a studio or a soundstage. It is where the team can park, prepare, store equipment, take breaks etc. In many shooting locations it is impossible due to location constraints to get a large enough area for all the team’s needs so a unit base is established in the vicinity.
Medical emergency location might be an obvious need on a shoot with more physical demands like stunt scenes, but just as relevant for minor injuries when a team member need to see a doctor. Adding emergency numbers to the location description might be a good idea, especially with a multi-national team or shooting in foreign locations.
All of these can be displayed in the call sheet and includes automatic links to maps and driving directions. The automatically added 10-day rolling weather forecasts that are automatically updated every third hour, are based off the shooting location.
Since you can use up to five different teams per day, that means that you can shoot with correct locations and weather updates in five different continents if you wish.
STEP 1: Adding a new location
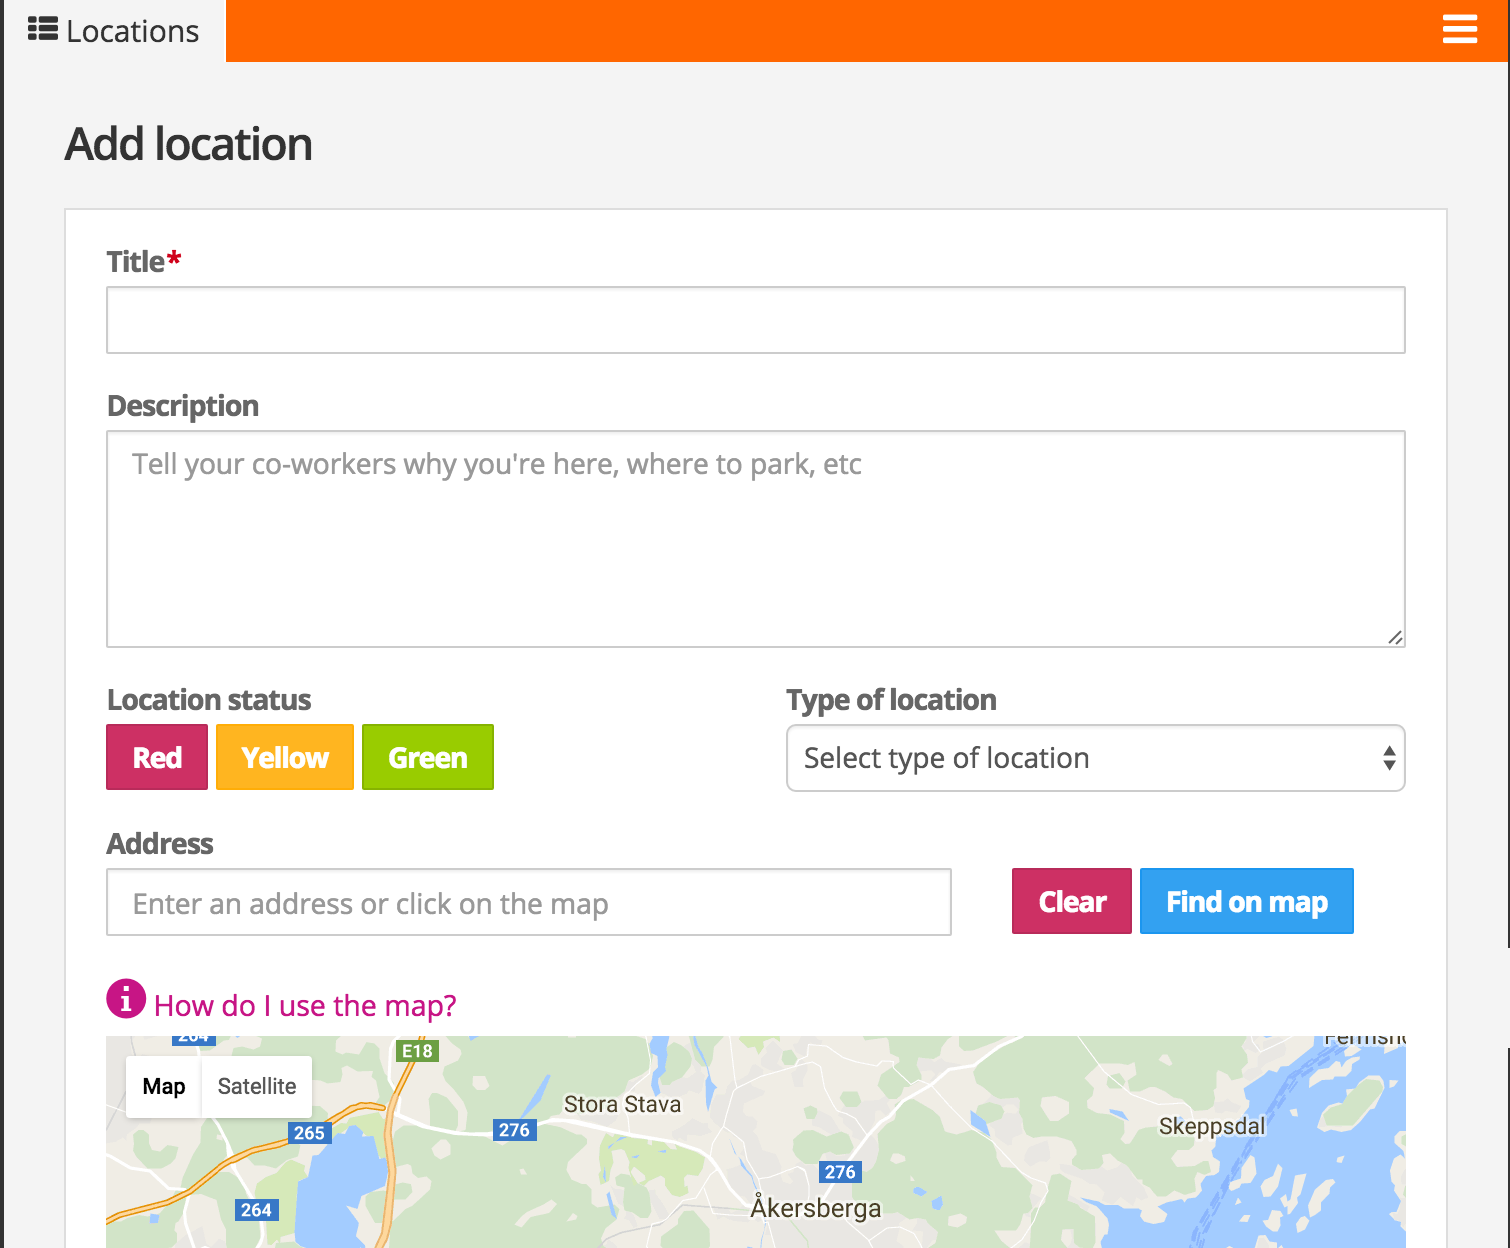
To add a new location, you click on Locations and then on the blue button marked Add Location.
You must add a location name and a location type; shooting location, unit base or medical emergency. It is only shooting locations that are linked to sets.
Unit base
Unit base is the base for all activity when the shooting location do not have enough space or facilities to be a convenient choice as a base for all shooting activity.
Medical emergency location
A medical emergency location is simply the nearest or preferred medical emergency facility, if something should happen. Here you also can add any production insurance information you want to be readily available.
Adding descriptive text information
Any text you add to the description field will be published both in the location list and in the call sheets. This means you can update this as you go along, first with requirements for locations scouts and set designers, then with todo lists for safety, electricity and other practical concerns. Later, prior to the shooting day, with updated road conditions, parking instructions and any other location information for the arriving team.
Adding the address
When adding the address, the most important part is being thorough. If you can find a correct street address, use that.
If you don’t have a street address
Sometimes adding a street address isn’t possible because the place might not have an address, either because the location is in a “white spot” not well covered by address registers and maps, or because there is no address since you are shooting out in the wilderness.
You can solve this by adding an address close by, for example a nearby town or village, in the address field and hit “Find position on map”. When you have found that position, you can use the map controls and click where your shooting location is. You’ll see that you now have GPS coordinates below.
You can also add GPS coordinates if you already have them, by writing or copying them into the fields underneath the map.
Click to save your new location.

STEP 2: Connecting shooting locations with unit bases and medical emergency locations

STEP 3: Adding status colours to a location
To learn at a glance in the location list, which status a location has, you can add a status colour. As described in STEP 2 above, click in the location in the location list, select the correct status colour, and click save.
STEP 4: Connecting locations with sets
To connect an existing set with a location, go to Sets, click on the set you want to add a location to, and then on the blue edit (pen) icon.

On the edit page, you simply use the dropdown menu underneath Location to select the set’s correct shooting location.

STEP 5: The location list report
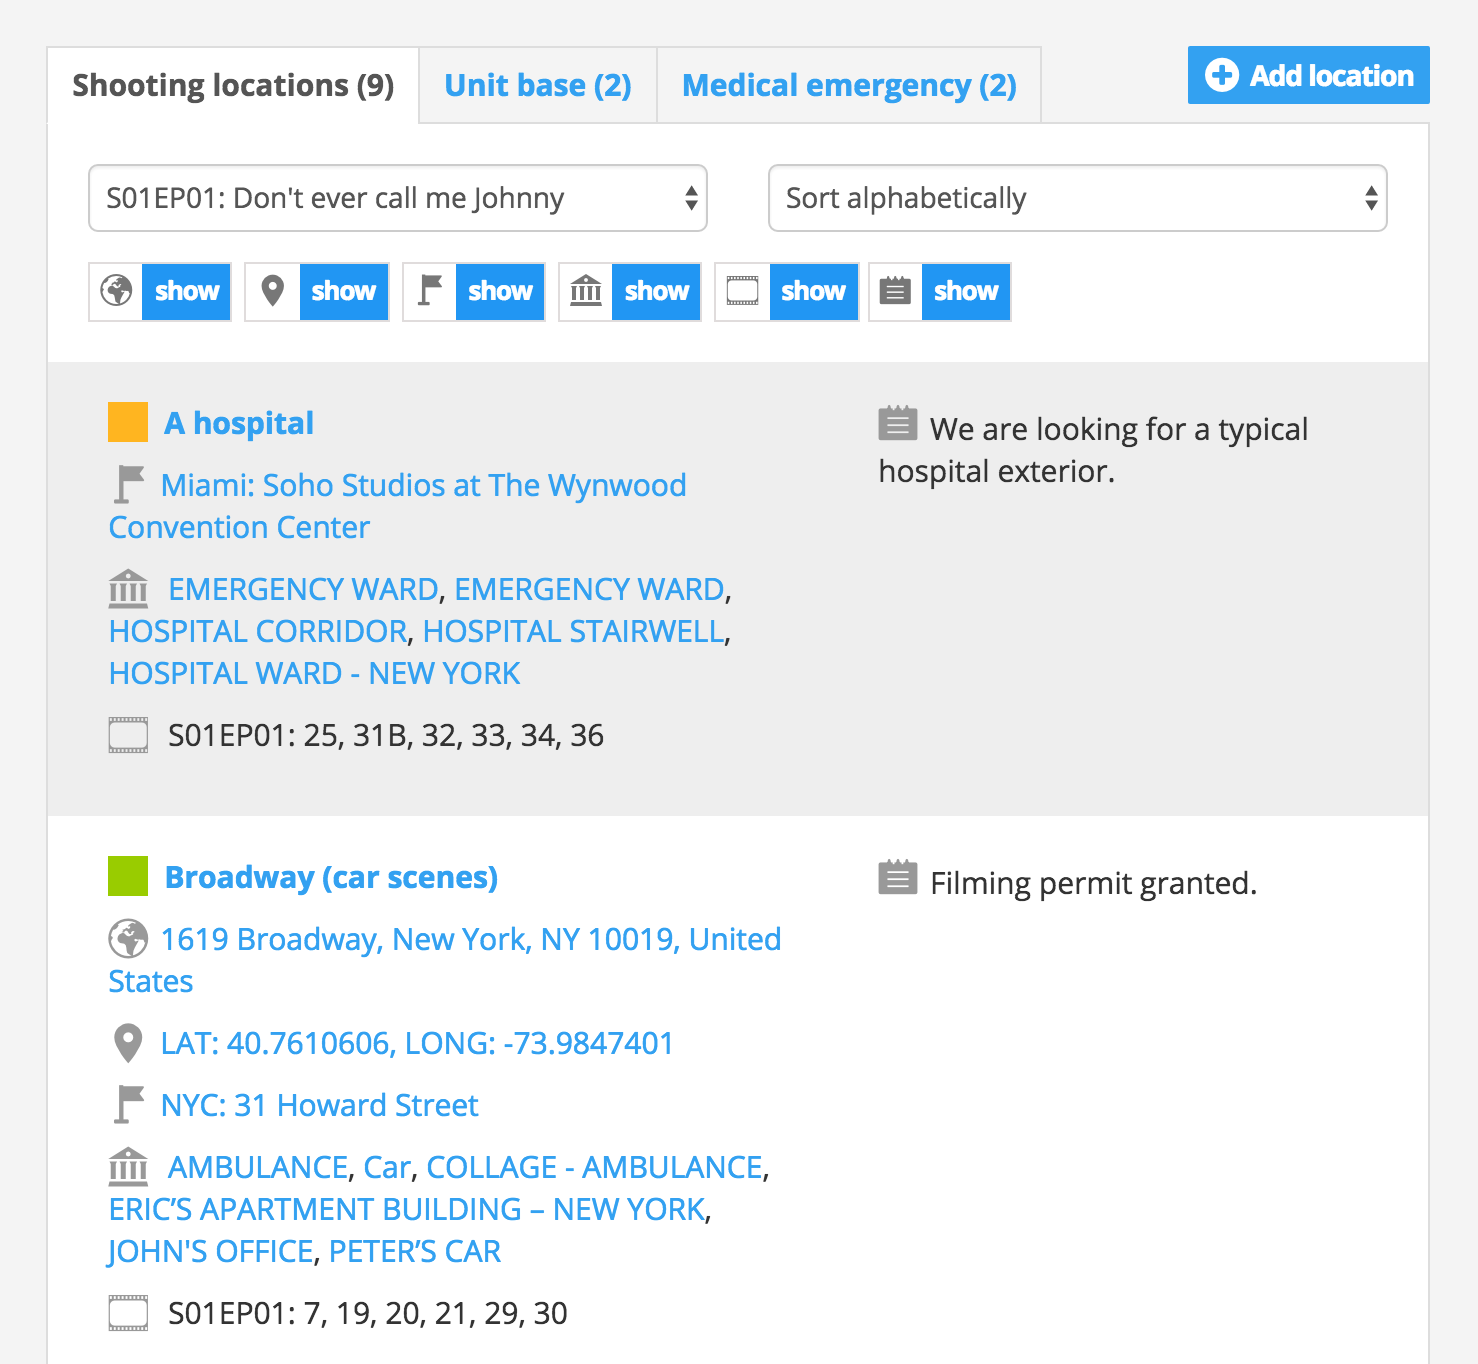
The location list doubles as a location report with the following information:
- Location name
- Location status – red, orange, green
 Address
 GPS location, latitude and longitude
 Unit base
 Sets
Sets Scenes
 Location notes
As you see in the image, you can hide any or several of these location information categories to produce the report you like.
By default the location list is sorted alphatetically by location name, but you can also sort it by production day.

NIFTY TIP: Create placeholder locations during breakdown
Here is a tip which can make pre-producing easier for sets and locations: You do not actually need a selected and confirmed shooting location or unit base, to add them to Dramatify. Instead you can see the adding of locations in stages. If you roughly know what kind of locations you need you can create placeholder locations that you later refine.
- If you import a drama screenplay, do NOT import sets, but skip them.
- Go to the breakdown by clicking Scenes in the sidebar menu, then Breakdown in the top toolbar.
- When you starting the breakdown, cmd-click (Mac) or ctrl-click (Win) on Locations and add Locations as another tab to your web browser.
- Look at the scene you are about to breakdown, and decide what kind of type location it needs, say a desert.
- Go to your new tab with the Location list, and click on Add location. In this example, we add a desert. Just add the name and if you’d like a description and a status colour.
- Click on the browser tab with the breakdown and reload the page.
- Now click on “Create new set”. In the popup add your set name, set details and add your newly created location placeholder as your selected location.
- Repeat steps 4 – 7 for the rest of the scenes, and you’ll have a complete set list with all the type locations that your location scouts can start working with and adding information to.


Using Google Maps for locations
All of your team have access to the scene list. This means that they can check out and research the locations beforehand.
Click the Location link and you see the map of your chosen location.

Click on Earth to see the satellite images of the location.
First, click on the pin to bring up a link to Street View images and the click on the Street View image to get to Street View. (Yeah, a bit complicated, not our fault 😉 )
At Street view, hold and drag to swing around in the image and explore the surroundings. Just click if you want to go further on a street. (Here is a video if you need more instructions).
Click on Back to map, to get back to the map and get driving directions from your current location.

Scene list, call sheets and breakdown report
Scene list
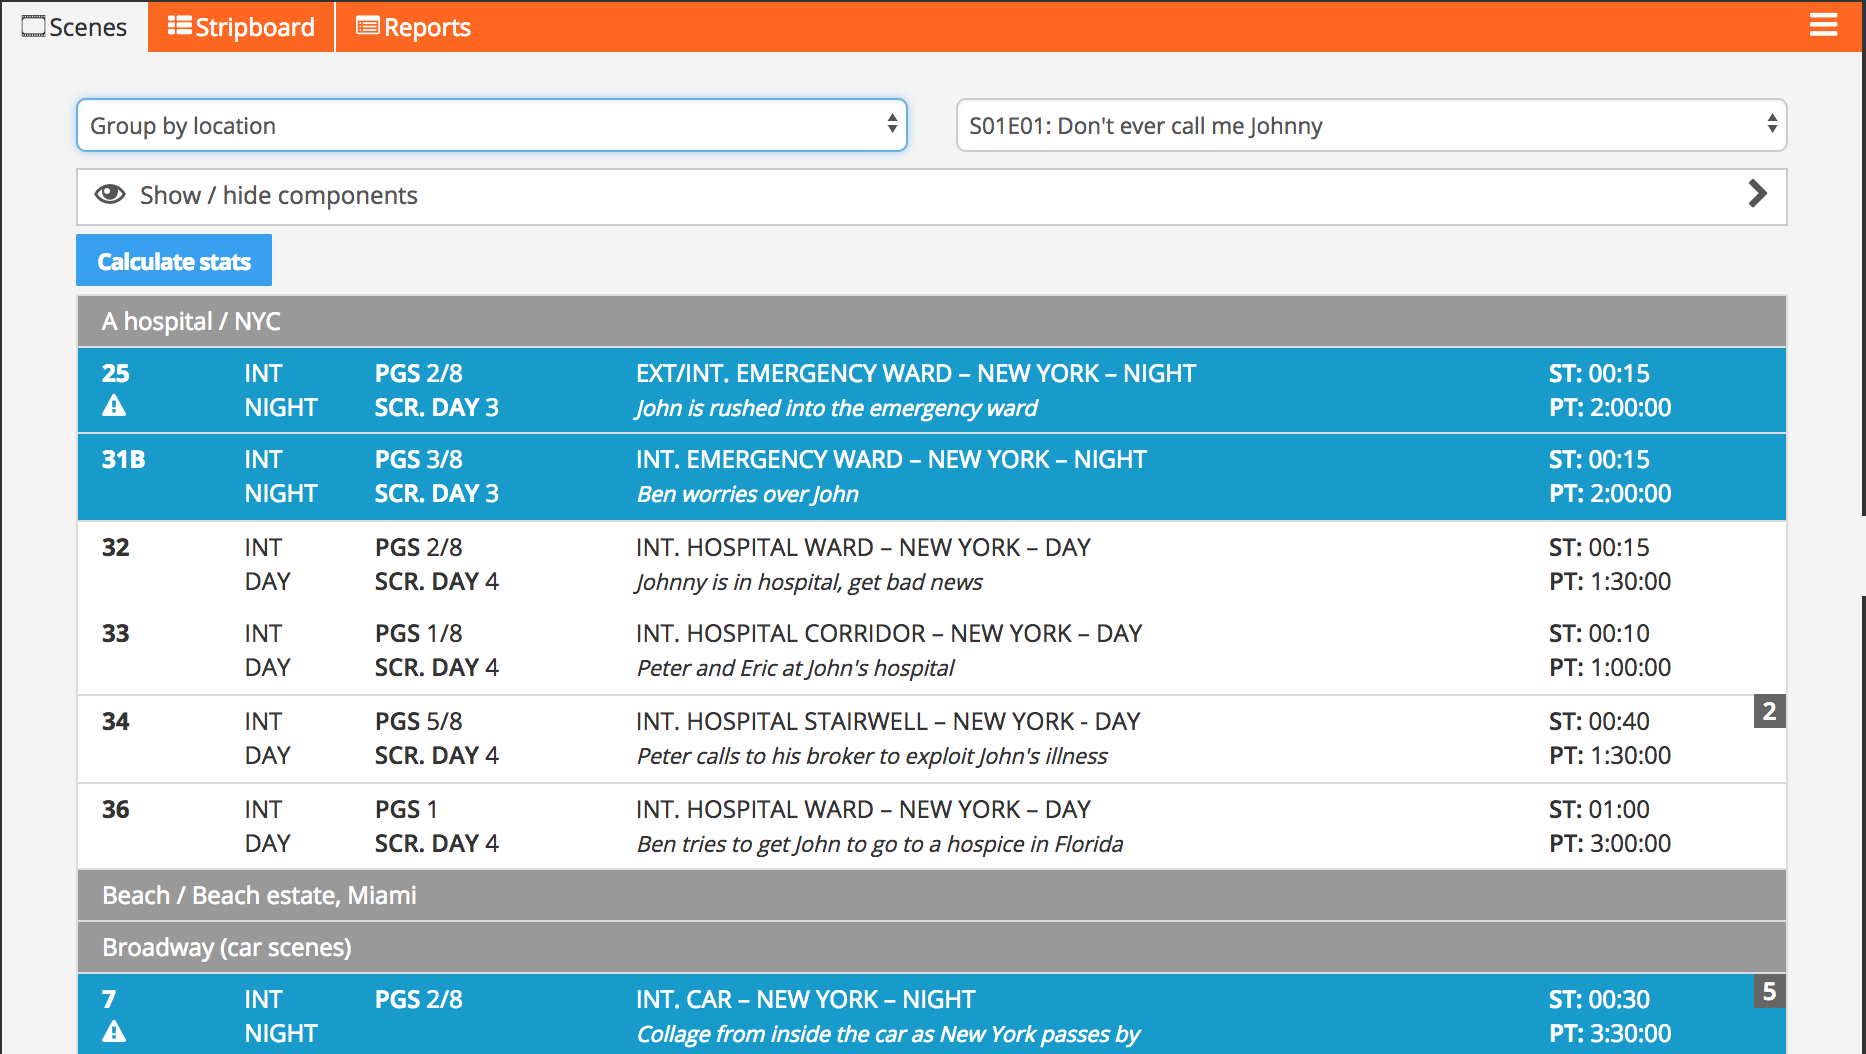
The scene list is ultra-sortable so you and your team can easily find exactly the scenes you are looking for. Click on the Location icon to see the location information and link.
You can also group scenes by location, which is a great tool!
If you want to print the scene list, just click on the Show/Hide bar and you can format your scene list as you like.

Breakdown report
The breakdown report consists of everything you have added to the breakdown and can be sorted on locations to give you all breakdown information on a certain location.

Call sheets
Finally, for most of your team, the call sheet is likely the most important document when it comes to locations.
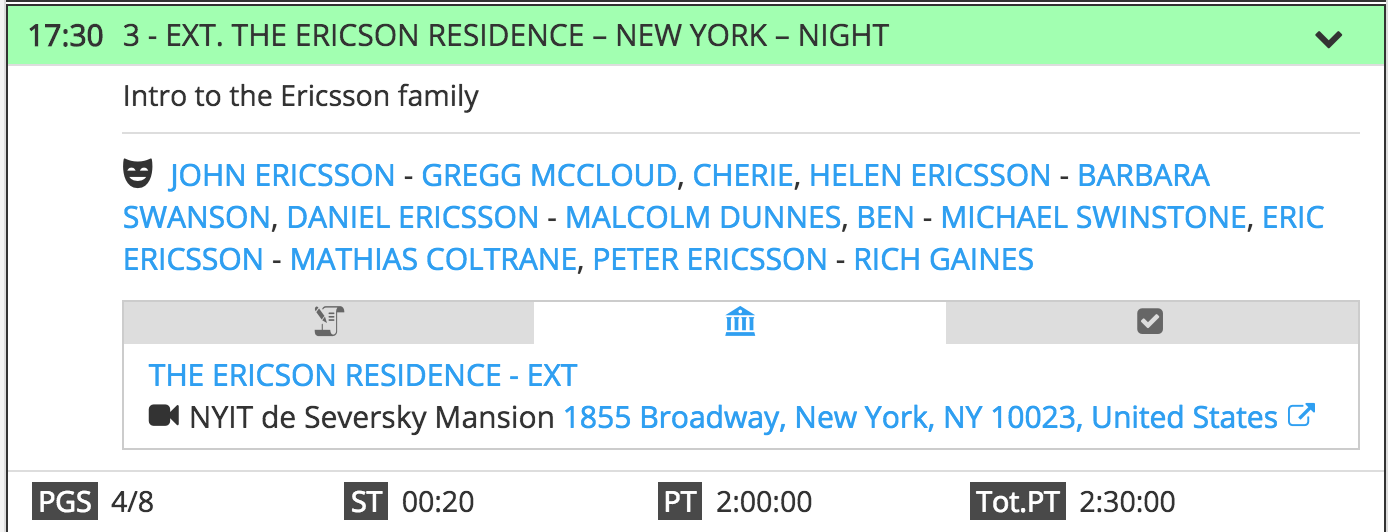
Under the Location headline, you find all locations with comments. Your team members need just to click the link to get the map and driving directions from their current location in their mobiles.
You can also update with manual driving directions, road conditions and parking directions that are important.
Under the headline Scenes and sets, you’ll find the exact set and location for each scene by clicking on the set icon ![]() .
.

And under Weather, you have a ten day rolling weather forecast for your shooting location
that is automatically updated every third hour.

Top image by Bro. Jeffrey Pioquinto, SJ/Flickr (CC BY 2.0).
Try Dramatify today - if you haven't already!
30 days free trial! No credit card required.