Managing scene items & scene elements
For all things & all departments! Sign up if you haven't already!Scene items and scene elements: Here is how to manage all items for your production.
Scene item and scene element mean exactly the same thing: Any item needed to create the scene you are about to produce. Adding and keeping track of scene items and scene elements for TV and film productions can be a nightmare – or a delight. Dramatify helps you manage all the stuff for your production!
Scene item management in Dramatify gives you smart mobile functionality, solid support for anyone in your team that handles any kind of scene items and lists that you and your team can filter and sort in many different ways according to each individual’s requirements.
You can add anything as a scene item and attach it to the appropriate department so they know what they need to handle!
Where do I find scene items?
Scene items can be added and managed in several places in Dramatify as we’ll show you below, but the main section is in Scene items in the sidebar menu.
STEP 1: Scene item basics
There are four ways you can add, edit and manage items in Dramatify:
- in the script breakdown
- in the scene items section
- on the individual pages for characters
- on the individual pages for sets
STEP 2: Permission and access for scene items
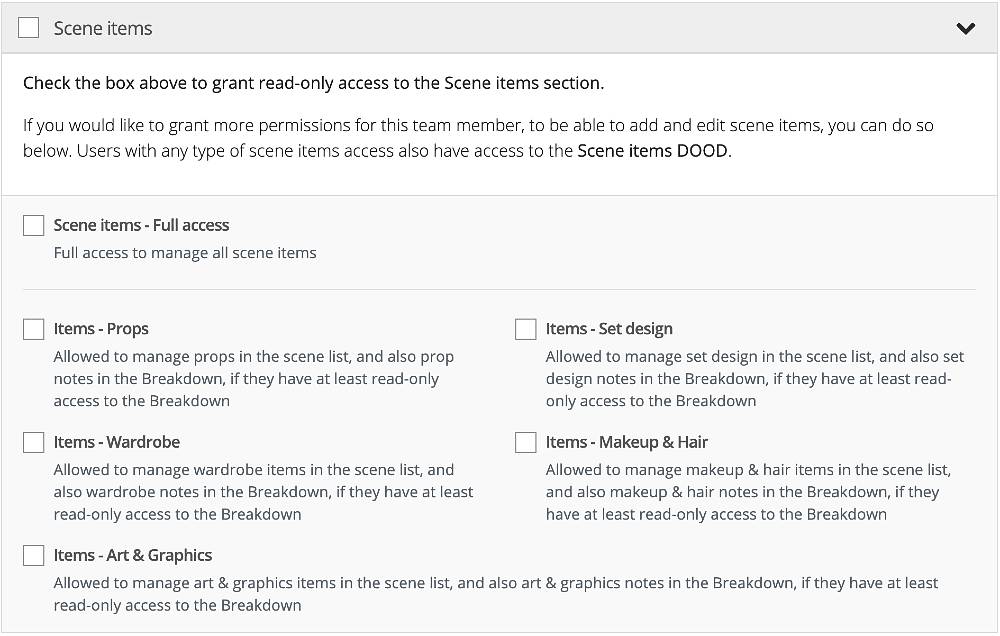
With the scene items permissions, you can grant different access to different team members. You add permissions by clicking on People. . Hover over the upper right corner of the profile card of the team member you want to grant new permissions to or add permissions when inviting a team member.
You can give the following access:
- Read-only access to the scene item list and the scene Day out of Day schedule
- Full access to the scene item list to add, edit and delete items, and read-only access to the scene Day out of Day schedule
- Partial access for certain departments to their items; Art & Graphics, Makeup & Hair, Props, Set Design and Wardrobe. These departments have read-only access to all items, but can only add, edit and delete the items belonging to their own department.

Combine with partial breakdown permissions
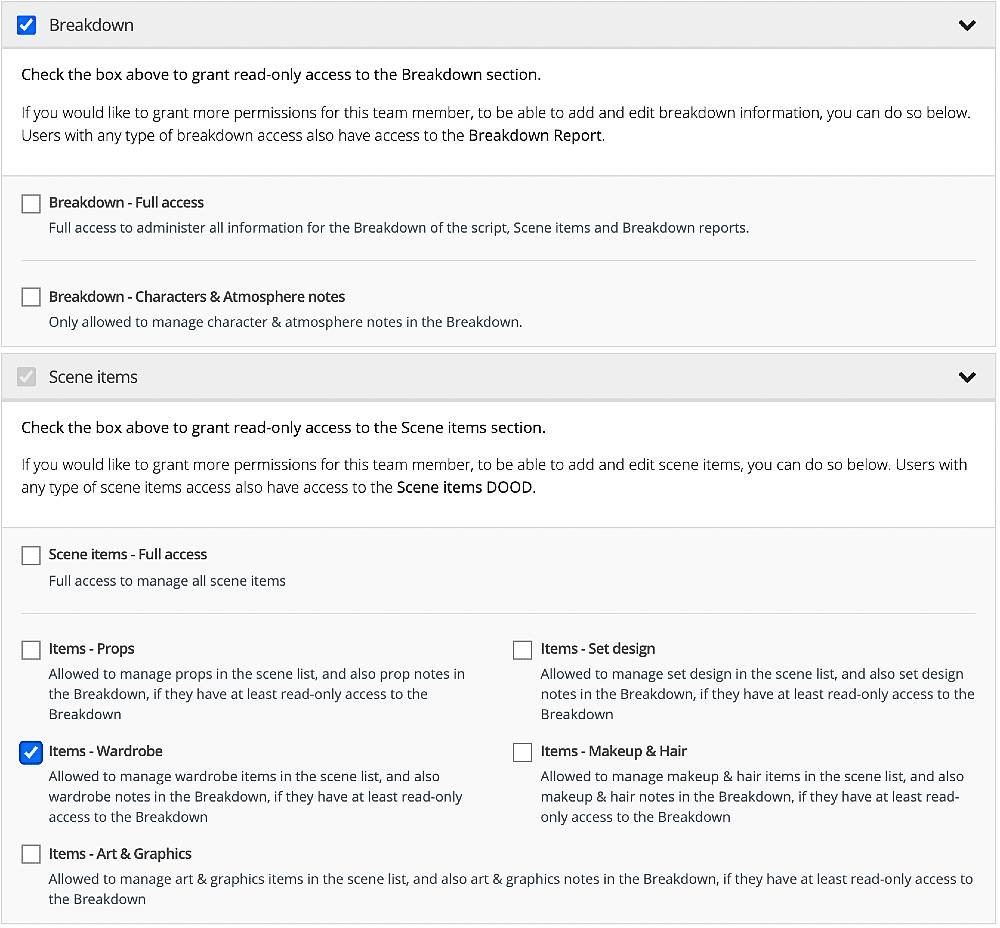
You can combine a partial scene item access with access to the script breakdown for only that department. If you have given a wardrobe designer partial access to the scene item management by checking “Items – Wardrobe” (see image above), they can view all scene items in the Scene Items list, but only add, edit and delete items belonging to the Wardrobe department.
If you also check Breakdown, the combined permissions (Breakdown – read-only + Scene Items: Items – Wardrobe) will allow the wardrobe designer to also access the script breakdown and read the breakdown as well as add and delete items in the Wardrobe section of the script breakdown (see image below). The same goes for the other creative departments.

STEP 3: Adding scene items in the breakdown
Usually, the AD starts adding scene items in the breakdown. It can be reached the breakdown by going to Breakdown in the sidebar menu.
With full breakdown permission, a team member can access all functionality of the breakdown. As described above, creative departments can get limited access to their own departments to add scene items. You can add edit specific permissions to all the functionality in the right-hand column in the image below. For a full description of how the breakdown works, read the how-to article on script breakdown.

Add a new scene item in the breakdown sheet
Start with opening the section where you want to add the scene item by clicking on the arrow to the right of the section title.

You can now add a scene item in two different ways:

-
- Add an existing item by start typing the name. You will get a list of suggestions matching your letters
- Add a new item by clicking the button
Adding a new scene item in the breakdown sheet
When you add a new scene item by clicking on the button “Add new item”, a popup will appear. You can add anything as a scene item, from obvious items like props, wardrobe and furniture, to crowd control, lights and specific camera equipment
At a minimum, you need to add an item name, what the scene item should be attached to (a character, a set or the scene itself) and which department it belongs to. In some cases, the department is pre-selected, like Props in the image below. Use the dropdown to change it to another department if needed.
Tip! By attaching a scene item to the correct department, you make it easier to find it through smart filtering. As explained above under “STEP 2: Permissions and Access for Scene Items”, the department also plays a role in which scene items other team members can access and edit.
Important: Items attached to a character
Items belonging to a character should be attached to that character. That means they will automatically appear on the character’s page and that the prop, wardrobe and makeup & hair departments have a full overview of them.
Character items can be:
- persistent –
- non-persistent
 A persistent item is something that should always accompany a character, like glasses, a wheel-chair or special effects makeup. A persistent item is added automatically to the breakdown whenever that character is added to a scene.
To make a scene item belonging to a character persistent, check the box “The item is persistent and is visible in all scenes where the character appears”
Important: Scene items attached to a set
Items added to a set are items that don’t change between scenes if that set is used again, such as furniture. Any items added to a set will be automatically added to the breakdown whenever you reuse a set.
Important: Scene items attached to a scene
Items that are only used in one or a few scenes are added manually to the particular scene or scenes they are needed in.
Additional item information
To each item, you can add additional information:
- An image
- Tags – these help you further categorise items or are useful when filtering scene items. Tags are stored centrally, and suggestions appear when you start typing.
- Options – can be used to list alternatives such as brands, different colours, or prices at different stores. Click on the star bullet to mark which option you selected.
The Breakdown report
If you have access to the breakdown, you also have access to the breakdown report with its extensive filters. Learn more in the article on Script breakdown.
STEP 4: Working with scene items list
If you have forgotten what scene items you have added, want to add, edit or delete them, or do advanced sorting or filtering – head to the scene items list.
A tip! If you want to have the scene items list handy while you work in the breakdown, just open it in a new browser tab so you have the breakdown open in one tab and the scene item list in another. Don’t forget to refresh the scene item list as you add items in the breakdown.
The default view of the scene items list is ordered by time: the latest added item. Each of the four columns Scene Item, Belongs to, Department and Updated can be reordered by clicking on the column header.

Filter scene items
The filters above the list can be combined for very finely grained filtering.
Adding, editing and deleting items
To add a new scene item, just click the blue “Add item” button at the top of the page above the filter block. It has the same options as the popup window in the breakdown. Go to the section above, “STEP 3: Adding scene items in the breakdown” to learn more.
To edit a scene item, hover at the right-hand side of the item to bring up the edit icon then click it as shown in the image below.

To delete an item, check it and click the delete button (see image below). You can also check several items to delete at the same time. Should you need to delete ALL scene items in a list click on “Select all” then on “Delete”. Note that if you use “Select All” to delete, it is only the items in the selection through filters you have made and can see, not every item added to the production.

STEP 5: Managing scene items on set pages
Managing scene items on set pages
To access scene items on set pages, click on Set & Locations, and then select the set you want to work with from the setlist. Scroll down to the section for “Items, Props & Decor“.
You can work with scene items directly on the individual set pages. Any scene items belonging to a set, added during the breakdown or from the scene item list itself, is automatically displayed on the page of the set it belongs to.
Permissions
To be able to view and read the setlist, set pages and any scene elements attached to them, the user must have read-only access. To manage, add, edit and delete items, they must have full access to sets.

Breaking down and managing set items
The set page Items, Props & Decor section can be used as a stand-alone set breakdown if the production does not want to give users access to the breakdown. The functionality is quite self-explanatory.
- Add new item – Click the button to add a new item
- Edit or delete an item – Click the edit (pen) icon
- Filter on department – Use the dropdown in the upper left corner of the section.
For more information on images, tags and options, please refer to the Breakdown section above.
STEP 6: Managing scene items on character pages
To access scene items on character pages, click on Cast & Characters, and then select the character you want to work with from the character list. Scroll down to the section for “Items / Props / Attributes.“
You can work with scene items directly on the individual character pages. Any scene items belonging to a character, added during the breakdown or from the scene item list itself, is automatically displayed on the page of the character it belongs to.
Permissions
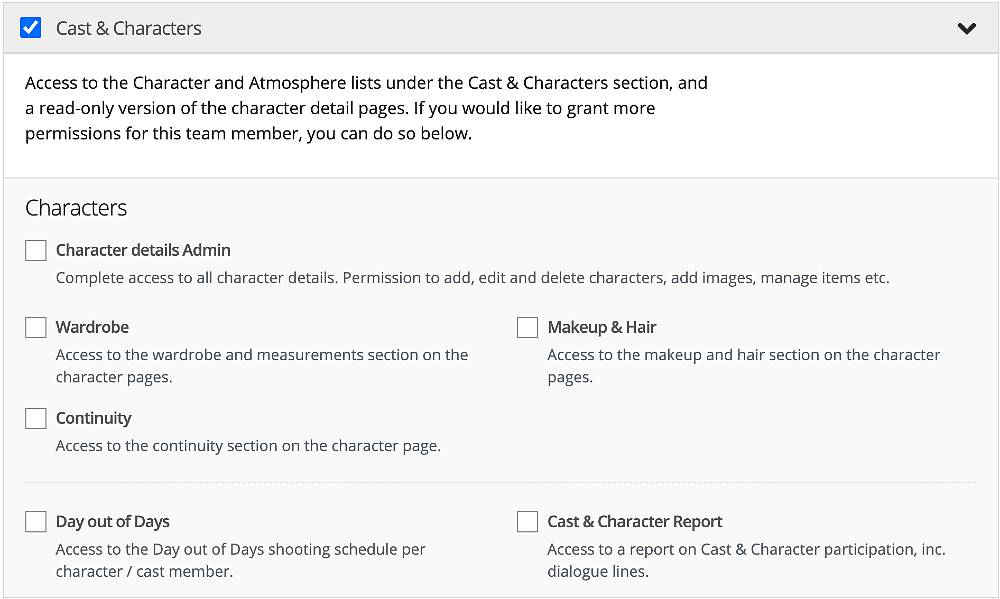
To be able to view and read the character list, character pages and any scene elements attached to them, the user must have read-only access. To manage, add, edit and delete items, they must have either full access to characters or permission for Wardrobe or Makeup & Hair.

Breaking down and managing set items
The character page Items / Props / Attributes section can be used as a stand-alone character breakdown if the production does not want to give users access to the breakdown. The functionality is quite self-explanatory.
- Add new item – Click the button to add a new item. Note that you must add episode and scene number/s if the item is not persistent. (A persistent item is an item that the character ALWAYS is seen with like glasses or a cane.)
- Edit or delete an item – Click the edit (pen) icon
- Filter on items – Use the dropdown in the upper mid part of the section. Here you can select to display all items, only persistent items or only non-persistent items.
- Filter on department – Use the dropdown in the upper left corner of the section.
For more information on images, tags and options, please refer to the Breakdown section above.
STEP 7: Working with scene items on mobile

Since Dramatify works great on mobile, you can bring with you Dramatify to stores and rental agencies. Or work on anything you need on set or while communting.
Related articles
Top photo by Karen Roe / Flickr (CC BY) ).
Try Dramatify today - if you haven't already!
30 days free trial! No credit card required.
