Preparing your screenplay or script sides for printing in Dramatify is quick, professional, and secure. Each document can be automatically watermarked, tagged, and made fully trackable — complete with a personalised watermark and optional cover page.
About Dramatify’s Automatic Watermarking #
Watermarking screenplays is an established industry standard for protecting intellectual property and managing distribution. At Dramatify, every screenplay printed from the platform — whether on paper or as a PDF — is automatically watermarked, tagged, and traceable. If your production company profile includes a logo, it is automatically used as a watermark. You can add or update a logo at any time.
Each printed copy includes your production company logo and a footer with complete printing and copyright information:
Printed [date] for [name of receiver] [title] [email address] © [Production Company Name]
Example:
Printed 2025-11-03 for Jane Smith, Screenwriter – [email protected] © The Production Company
Check Your Watermark Logo #
- Go to the Project page of your production.
- Look to the left of your production company name:
- If your logo is visible, it will be used automatically.
- If you see a grey camera icon, upload your logo to replace the placeholder as per below.

Adding or Updating Your Company Logo #
- On the Project page, click the name of your production company.
- On the company profile page, click Edit.
- Under Logo, click “Select image” to upload your company logo and save your changes, or click the trash can to remove and replace your logo.
Note: Only business account administrators can edit company information. If you don’t have access, contact your production company admin.
Logo Display Notes #
- The logo appears as a square in Dramatify, but retains its original proportions when printed.
- On printed pages, the watermark logo is shown in light grey for optimal readability.
Previewing Your Watermarked Script #
- Open Scripts in your project.
- Select your screenplay or script sides.
- Click the menu icon and choose “Print PDF.”
Your company logo appears as a watermark on the first page of the script (not on the cover). The footer shows the recipient’s details and the printing date.

Personalised Watermarks for Screenplays and Script Sides #
For added security and traceability, Dramatify also allows screenplays and script sides to be printed or exported with personalised watermarks. Each copy can display:
- The recipient’s name
- The production company name – added automatically
- The printing date – added automatically
To print, click the black menu icon and select Print with watermark. This supports secure sharing of sensitive documents and makes every distributed copy uniquely identifiable.

Adding a Custom Cover Page #
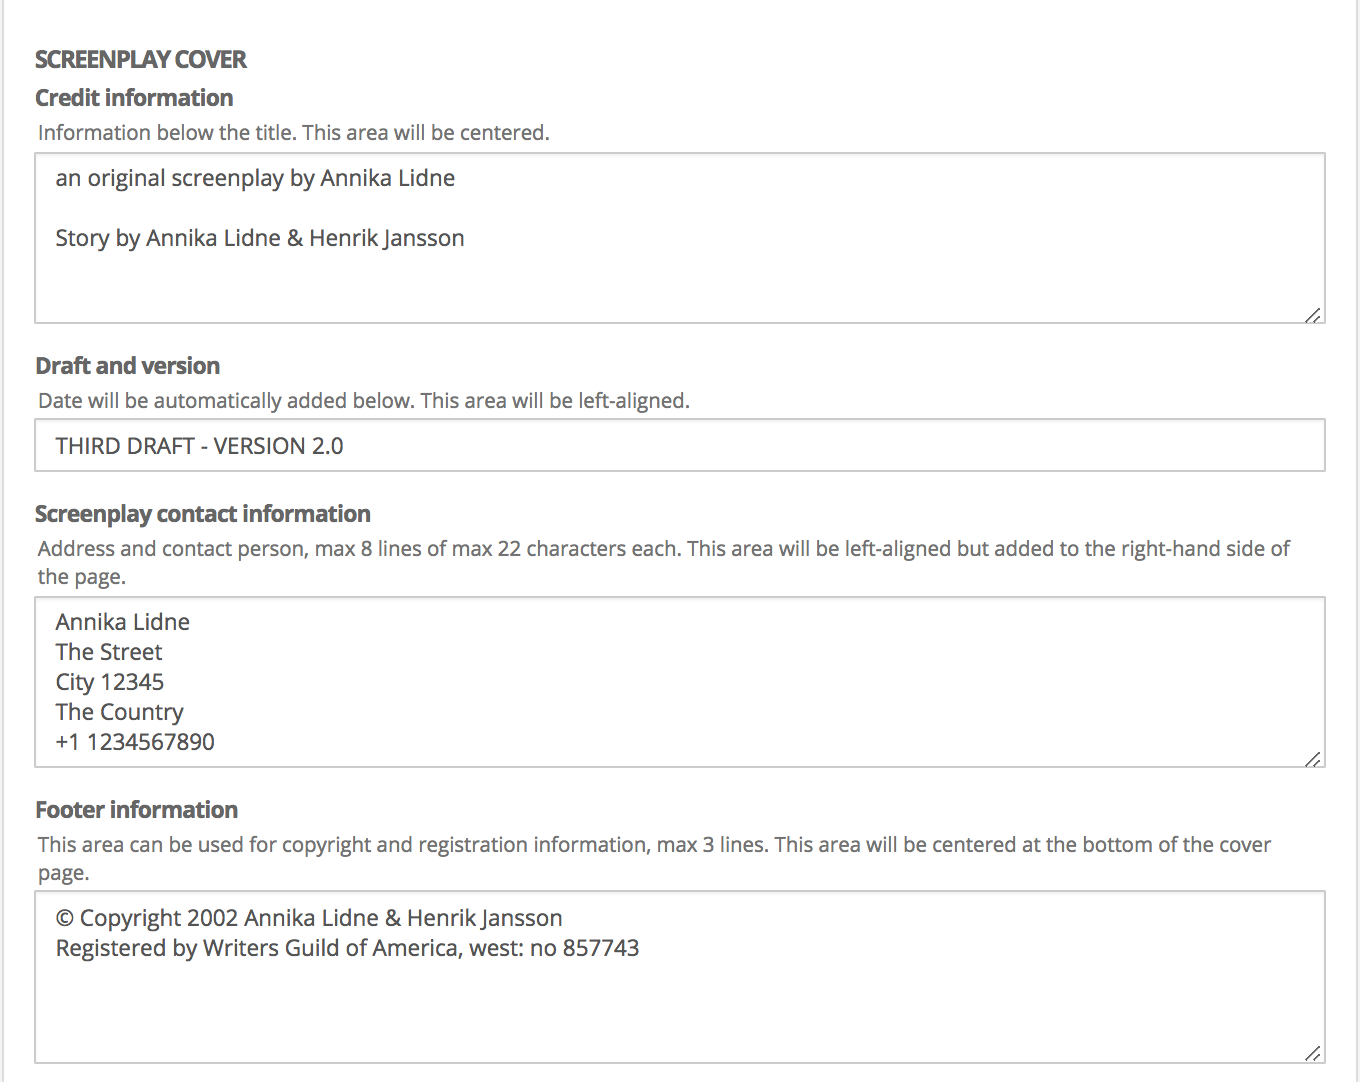
When you import a screenplay, Dramatify can include credit information from your .fdx file. If you’ve written the screenplay directly in Dramatify, you can create a professional cover page within the editor.
To Add or Edit a Cover Page #
- Go to Scripts (& Episodes). If your production includes episodes, click the relevant episode.
- Click the menu icon on the right-hand side of the orange toolbar.
- Select Edit script.
- Scroll to the Cover Page section and complete your details.
Cover Page Fields #
- Title and credits (centred)
- Draft and version (left side)
- Contact details (right side)
- Copyright and registration (centred footer)
Your printed PDF will include a clean, professional cover page followed by your fully watermarked script.

Summary #
Dramatify automatically handles watermarking and tracking for all printed screenplays and script sides. With a custom logo, personalised receiver details, and a formatted cover page, your documents are ready for secure and professional distribution.
