Working with Story Order, Scene list & One Liner Script
Format & filter with a few clicks! Sign up if you haven't already!How to work with Story Order, Scene list & One Liner Script
The scene list in Dramatify is filled with nifty add-ons such as stats, production progress and smart filters. You can also format a one liner script for printing or pdf-ing with a few easy clicks.
Note that we have made some changes to the design of the scene list. More info below.
Where do I find the scene list?
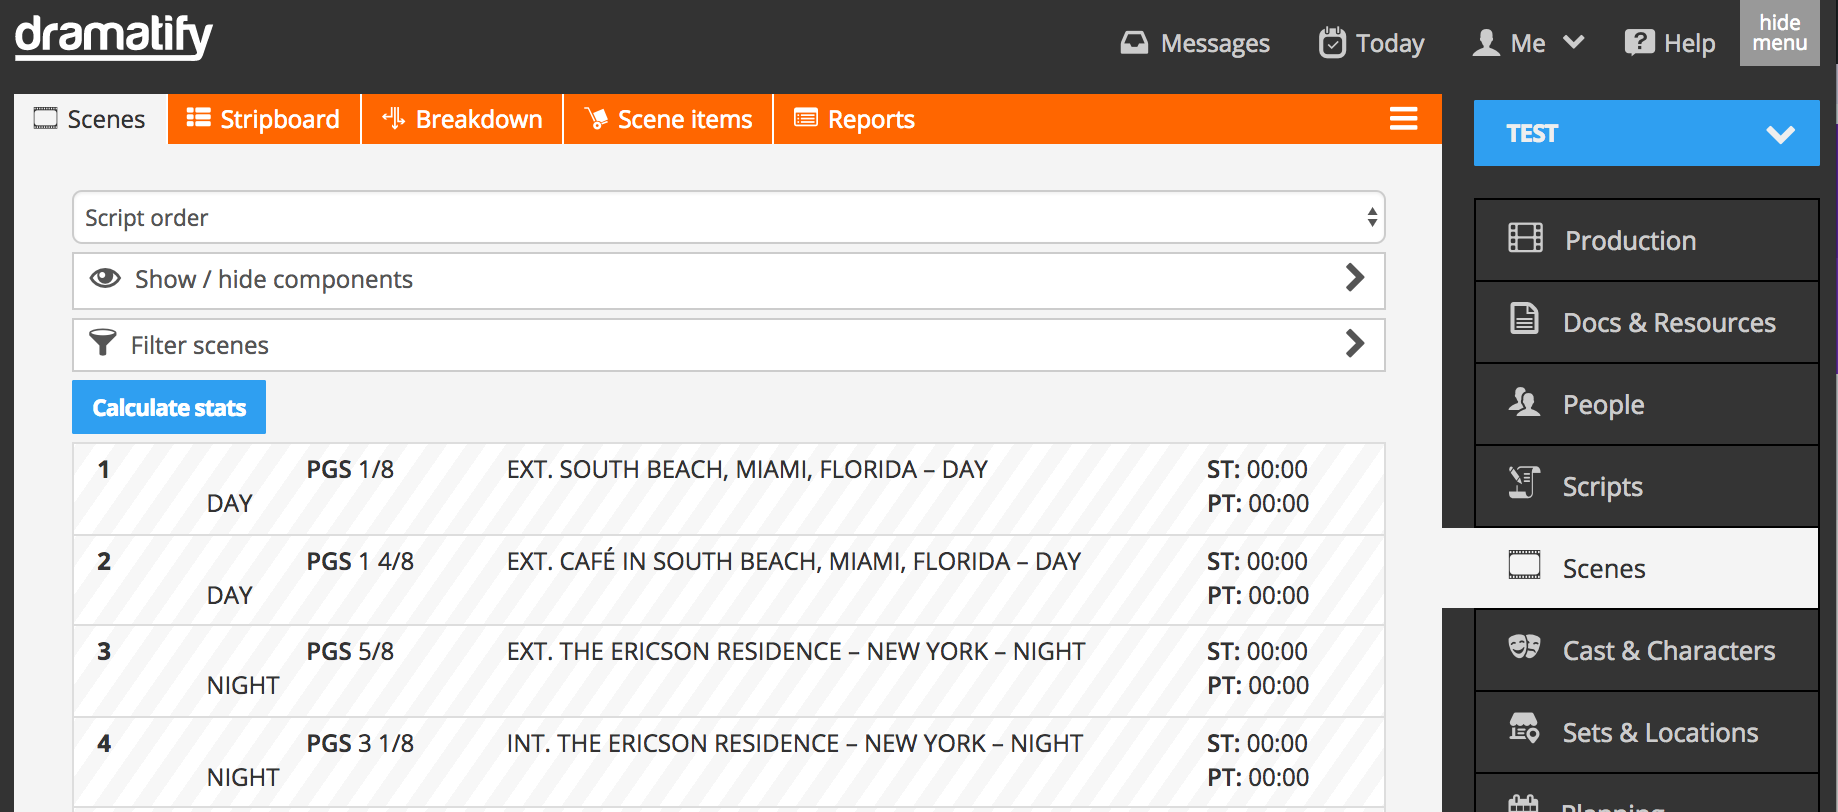
The scene list before breakdown
The scene list before breakdown
Before you have started your script breakdown, your scene list is grey with very little information. This is normal.
Note that the striped pattern indicates that your scenes aren’t properly broken down.

The stripboard colours
Below you find the stripboard colours for drama screenplays and AV scripts. They build on the standard industry colours, but where they are lacking (dawn, morning, dusk, evening) we have added our own. Note that rundown stripboard colours build on the source colours.
|
INT. DAWN INT. MORNING |
EXT. DAWN EXT. MORNING |
||
|
INT. DAY INT. AFTERNOON |
EXT. DAY EXT. AFTERNOON |
||
|
INT. DUSK INT. EVENING |
EXT. DUSK EXT. EVENING |
||
| INT. NIGHT | EXT. NIGHT |
Your scene list after breakdown
After breaking down your script, the scene list will have all the relevant information.

At the top of the scene list, underneath the Show/Hide bar, you’ll see the Calculate stats button. Click to learn production stats with productions days (after scheduling is done), total pages, estimated running time and estimated production time. You can also use the “Filter scenes” section and re-calculate to learn specific information, such as number of days with a specific character/cast member on a specific location.
Fast breakdown stats
The stat function makes it possible for you to make a first quick breakdown of your script without cast or scene items, but adding basic breakdown information as well as the estimated segment time of each finished scene and the estimated production time of the scene. Click on the Calculate stats button and you’ll know at a glance if the estimated running time of your production is within your goal and if the estimated production time is within your budget.
Scene information
In each scene, the scene information is quite self-explanatory, but a few things are important to point out:
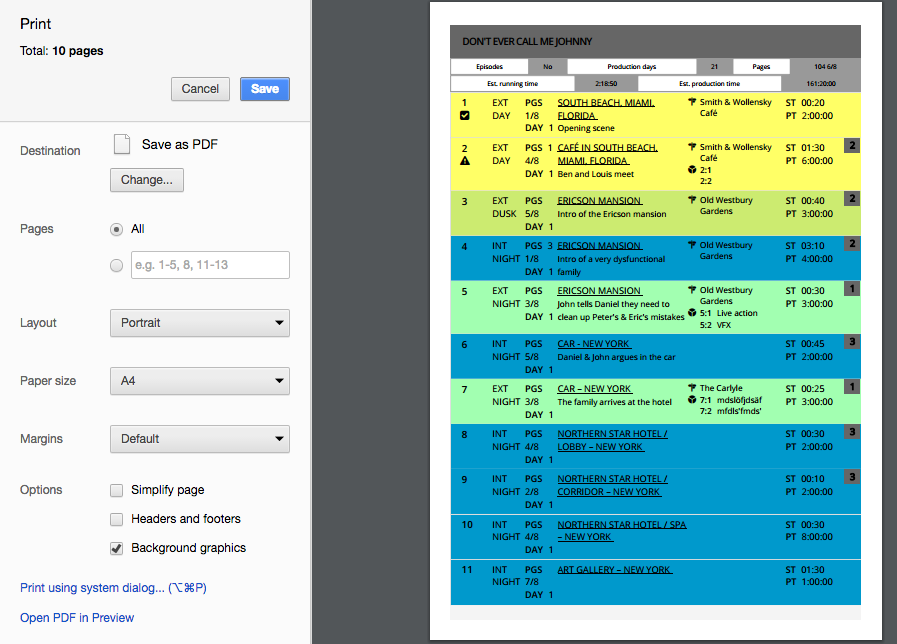
- ST and PT to the right means Segment Time, i.e. the estimated finished time of each scene, and Production Time, i.e. the estimated production time of the scene.
- The number in the dark grey box to the right is the production day number.
- The PGS and DAY just before the set and synopsis, are the page length (PGS) of the scene, and DAY is the script day.
- The checkbox to the left in Scene 1 indicates that the scene have been shot and is done.
- The warning sign to the left in Scene 2 indicates that the scene have been partially shot but is not done and needs to be completed. The scene status is set by an admin directly in the call sheet.
Strip information
In the section above the scene list, you can format the scene list into the perfect one-liner script with the click of a few buttons.

Filter scenes

With the filter tool, you – and any person in your team – quickly can see all the scenes with a specific character, on a specific location, int/ext, set, time of day, script day or production day. If you use episodes, you can filter to just see the scenes of a particular episode.
During shooting, you can also filter on progress to see all the scenes that have been shot, those that are unfinished or those that have not yet been filmed.
Next, you can also combine filters. You can with two clicks see which scenes are unfinished with a specific character, which scenes are to be shot at night at a specific location, all the scenes of script day 1 or production day 14 and much more.
Sorting scenes
Sorting scenes
Sorting scenes means that Dramatify show ALL scenes but sorted in the manner that you like. The default, that you always see unless you change it, is by script order, i.e by scene number going from the first scene to the last scene.
At the top of the page, you can change the sorting order from the default script order and instead group on set or group on location.
Group by set
As you see in the image, when grouping by set you get a list of all your sets with the scenes that belong to them.
Group by location
As you see in the second image, when grouping by location you get a list of all your locations with the scenes that are filmed at each.
Customise your scene list and make a one liner script

Click on the “Show / Hide” accordion and you’ll see the various selections you can turn on and off.
Print the scene list on paper or as a pdf
Design your scene list or one liner script as you want it, then click on the Edit menu to the right in the orange toolbar and select Print.
Now, depending on your web browser there are a few different choices you can do.
In the print selection popup, you can select if you want the web browser header and footer and if you want your scene list in colour or black and white.
Google Chrome
In Chrome, background colours are default as is the Header and Footer. Deselecting “Print Headers and Footers” leaves you with clean page in colour. Deselecting “Background graphics” removes the stripboard colours and leaves you with a black and white scene list.
By selecting your destination to the left in the upper part of the page, you can print to pdf or select a printer and print on paper.
NOTE! Chrome have a bug. If you use “Character names as IDs” and would like the the index of Characters & Cast on one page, and that the scene list starts on the next, please use the Firefox browser instead.


Apple Safari
In Safari, background colours are default as is the Header and Footer. Deselecting “Print headers and footers” leaves you with clean page in colour. Deselecting “Print backgrounds” removes the stripboard colours and leaves you with a black and white scene list.
Click Print to print to paper. Click on PDF in the lower left corner to make a PDF.
NOTE! Safari have a bug. If you use “Character names as IDs” and would like the the index of Characters & Cast on one page, and that the scene list starts on the next, please use the Firefox browser instead.

Firefox
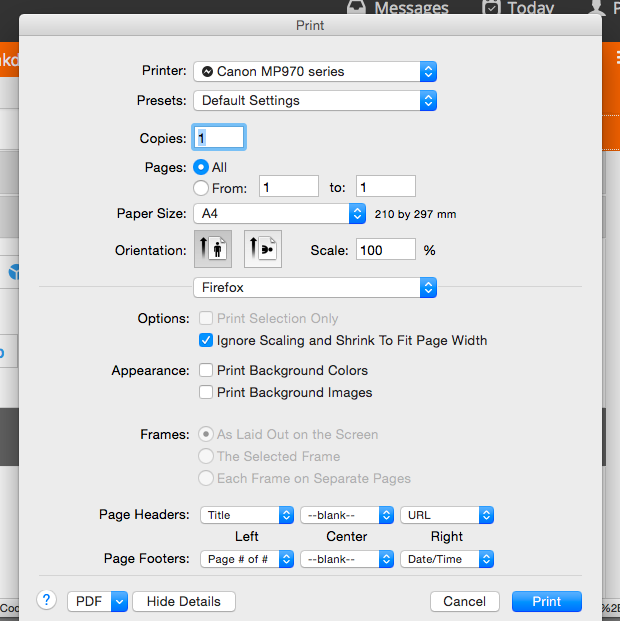
In Firefox, click “Details” as the small print dialogue box pops up.
In Firefox, background colours are turned off by default while you can customize the Header and Footer if you’d like.
To print a black and white scene list, do nothing. Tp print a scene list with coloured strips, click Appearance: Print Background Colors”.
Deselecting “Print headers and footers” leaves you with clean page in colour. Deselecting “Print backgrounds” removes the stripboard colours and leaves you with a black and white scene list.
At the bottom of the print dialogue popup, you can customize headers and footers. If you do not want them, set them to “blank”.
Click Print to print to paper. Click on PDF in the lower left corner to make a PDF.


Top image by Bob Bekian / Flickr (CC BY SA)
Try Dramatify today - if you haven't already!
30 days free trial! No credit card required.