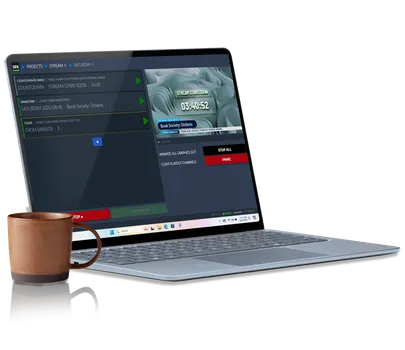
Dramatify connects directly to the SPX Graphics controller, so your rundown and your on-air graphics stay in sync from planning through playout. Content creators add graphics information straight into the rundown shot list, and graphics operators import it into SPX with a click — no duplicate data entry, no last-minute mismatches.
Required subscriptions & licenses
To connect Dramatify and the SPX Graphics controller, the following is needed:
- A Dramatify subscription for the Non-Fiction Starter plan, the Professional plan or an Enterprise license
- An SPX Controller license
- An SPX-Dramatify Connector license
Access rights in Dramatify
The graphics operator. The graphics operator responsible for configuring the SPX-Dramatify integration must be assigned as a Contributor with Tailored access to the specific production(s), to retrieve the appropriate rundowns from Dramatify. This setup also enhances security, as the operator can be removed from the production if necessary, automatically invalidating their personal token and cancelling the integration.
Content creators. Content creators who are responsible for writing graphic content must also be designated as Contributors with Full or Tailored access, specifically ensuring Full access to scripts.
Adding or changing access. Access is set up when inviting the team member to Dramatify, but can also be changed afterwards:
- Click Crew in the sidebar menu
- Find the team member
- Hover over the upper right hand corner of the member's card and click the edit icon
- Change permissions as required
- Remember to save at the bottom of the page!
Installing the SPX Graphics Controller
The SPX Graphics Controller is either installed locally on a Windows, Mac or Linux computer, or used as a SaaS solution (more information coming).
- Download the software
- Follow the instructions to install it
- Load templates previously created for your production or production company, modify the demo templates that come with the installation, browse the SPX store for professional templates, or create new HTML templates with Loopic
Connecting your Dramatify account to SPX
Follow the instructions to download the SPX Dramatify connector and set it up. When the connector asks for your personal token, log in to your Dramatify account:
- Click on your name in the top navigation and select Profile/Settings
- Click Settings in the orange toolbar

Creating your personal token
Scroll down to the SPX Integration section and click Create token. Paste the token into the SPX Dramatify connector as instructed. You will now be able to match your SPX project templates to your available productions in "Send SPX Templates" — click Send Templates to send them to Dramatify.
Note that the token is valid for 30 days before it needs to be renewed.

Renewing your token
If you need to renew or change your token, go to your profile and first click Create new token, then Copy token.

Turning on the SPX Graphics column
Adding graphics information in Dramatify for SPX playout is very easy — you add the information directly in the rundown shot list.
- Click Scripts (or Scripts & Episodes) in the sidebar menu of your production
- Select or add your rundown script
- In the rundown, click the black menu button in the upper right corner of the rundown and select Script settings

Adding SPX Graphics to your rundown template
In the Script settings, scroll down to the Shot columns section. You'll find SPX Graphics at the end of the options list — click to turn it on and select the column order. Remember to save at the end of the page!

Adding graphics information to a shot
Here is how to add the SPX graphic content to your rundown:
- Click the scene/segment to open for editing, or use the edit button
- Scroll down to the shot list and either add a shot or use an existing shot
- Click the SPX Graphics button to bring up the list of available templates
- In the popup, select a template — you may assign one graphic per shot. Make sure you click Done to save your graphic information. Different templates may offer various input options and configurations depending on how and where they display your content. If additional graphics are required, you will need to add a new shot with the additional graphic.
Note: Dramatify will display only the templates available for this specific production in SPX. If additional templates are required, they must first be created and made available in SPX, then sent to Dramatify.
- You will now see the graphic output in the SPX graphic column
- Don't forget to save the scene!

Selecting a graphics template
To edit a graphic, click on the graphic's text in the shot list — you'll see the same popup as when you created the graphic, and can edit the information as well as change the template. Click Done to finish, and don't forget to save the scene.
To delete a graphic, click on the graphic's text in the shot list, then click Clear at the bottom left and then Done. Your graphic information is now removed — don't forget to save the scene!

Exporting graphics content to SPX
Before the show is to begin, you must import the graphics information from Dramatify to SPX. During a long live show, you can repeatedly import new content from Dramatify if the rundown and the graphic information is updated.